🍽️ How to Use Custom Schedules Per Table in Alex Reservations
Managing dining room flow just got smarter. With Custom Table Schedules, you can define specific time slots and shift durations per table, optimizing kitchen load and improving guest experience.
Let’s walk through how this powerful feature works, step by step — with visuals to guide you.
🔧 Step 1: Select the Reservation Mode
Inside the Shift settings, select the reservation mode called "Tables Schedules".
Once selected, a grid view of all your tables and their combinations will appear. From here, you’ll be able to configure individual schedules per table and per day of the week.
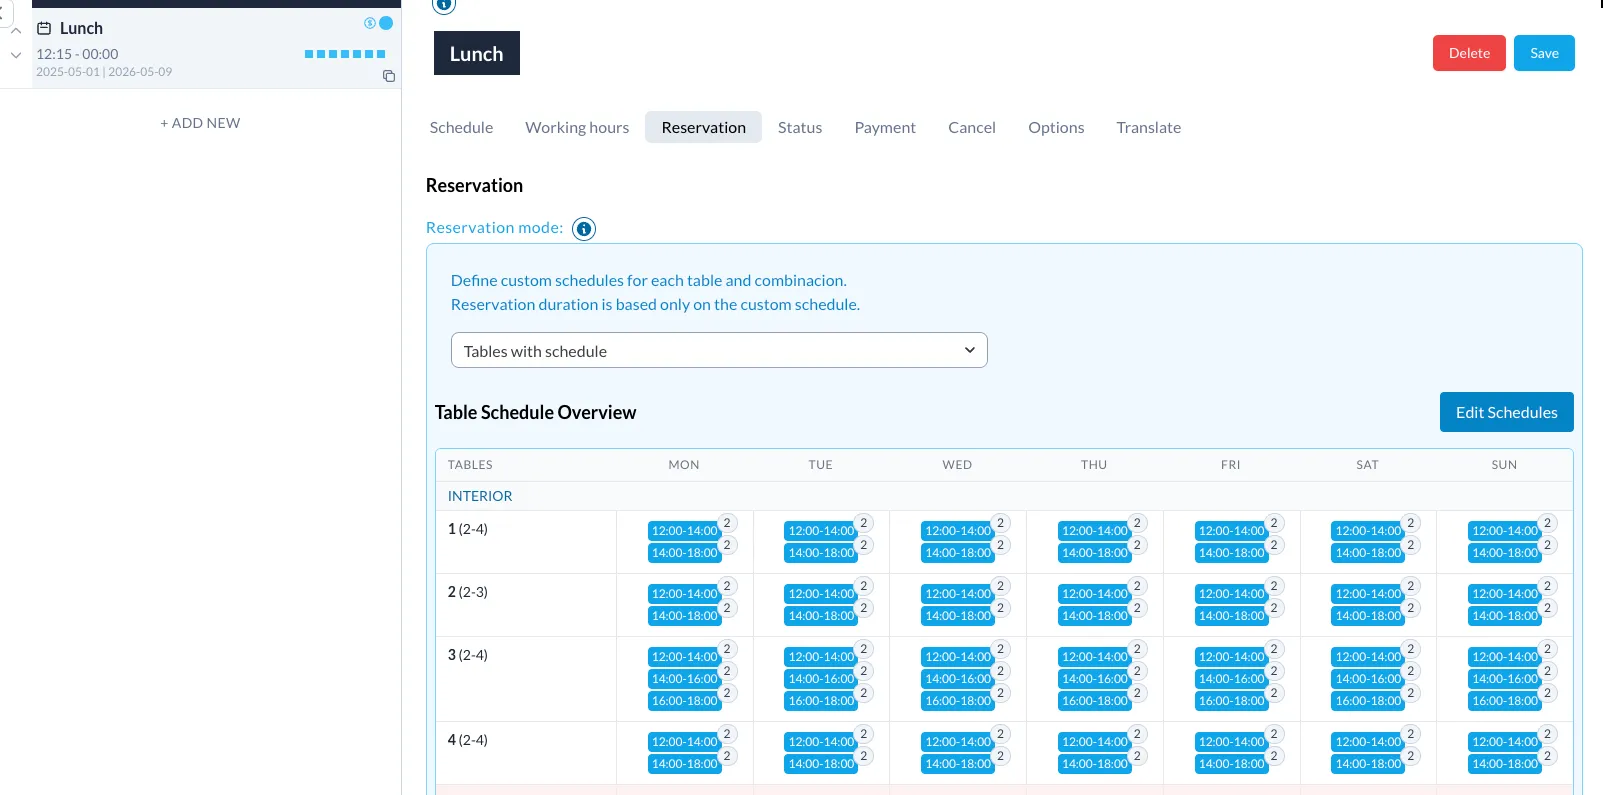
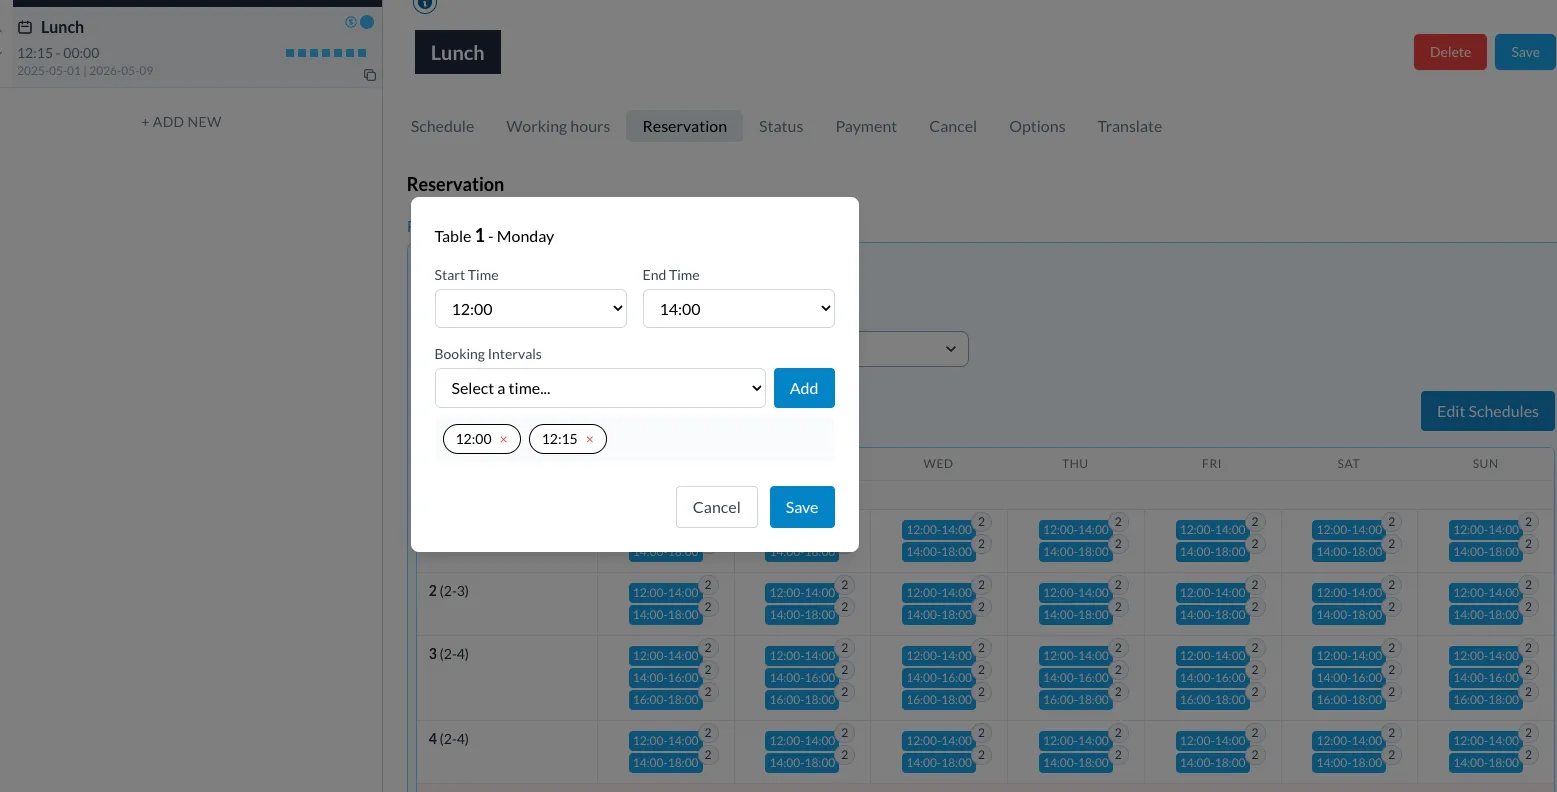
🕒 Step 2: Edit Each Table’s Schedule
Click the “Edit Schedule” button to begin customizing. You can now assign custom shifts to each table — defining when reservations can be made and how long guests can stay.
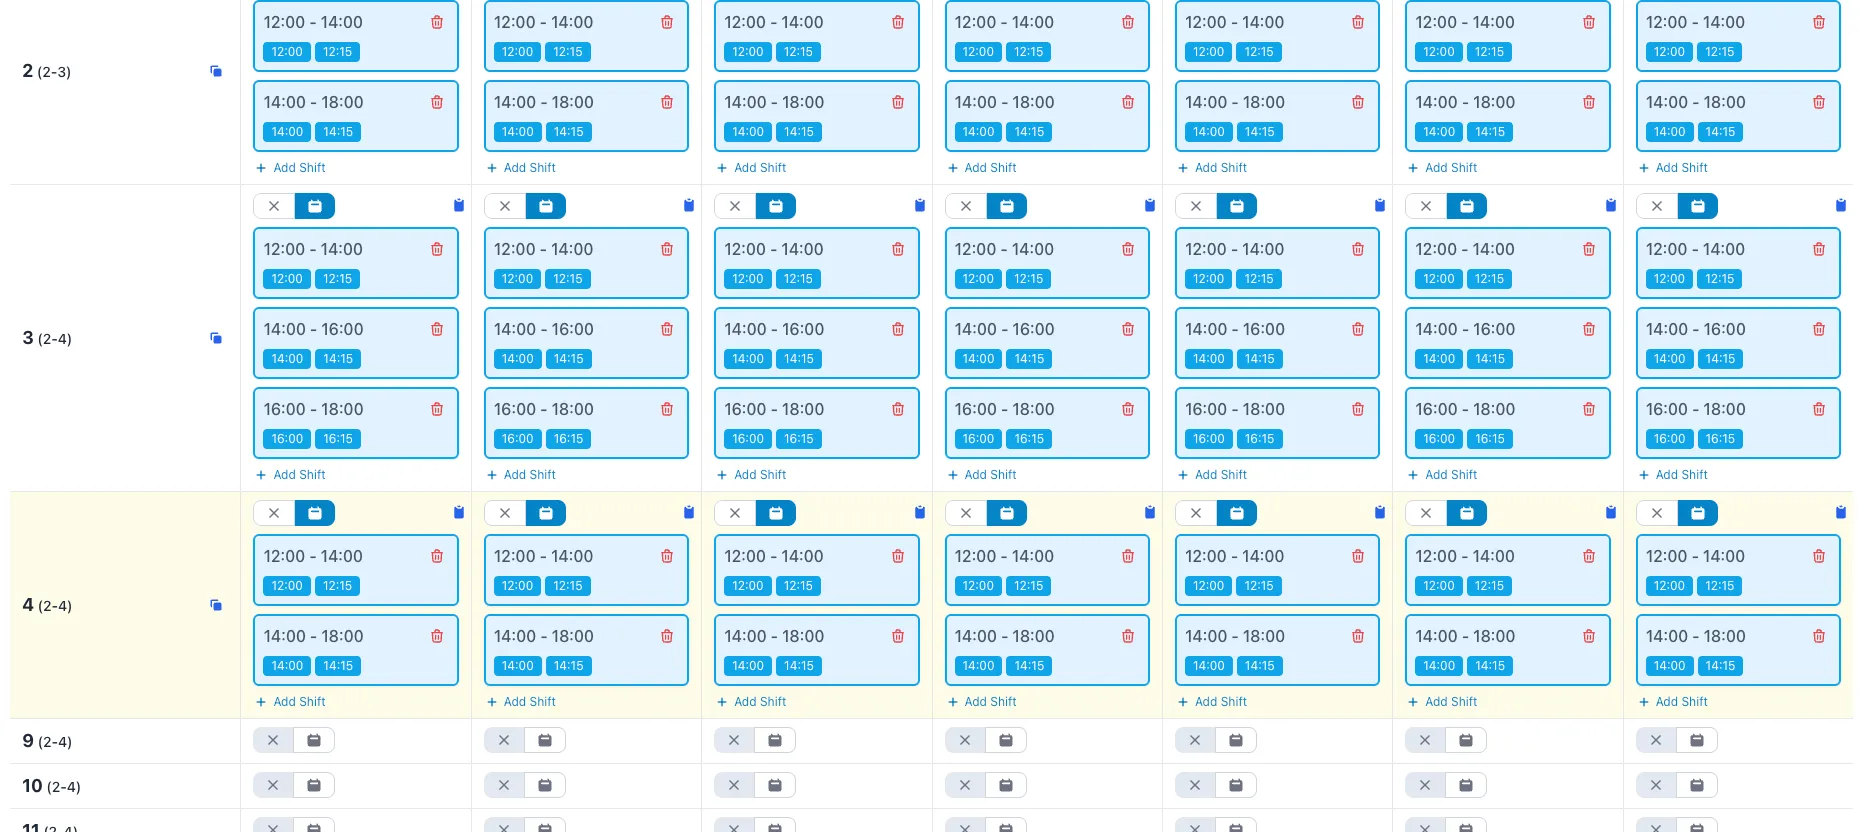
For instance, for a shift from 13:00 to 15:00, you can allow bookings at 13:00, 13:15, and 13:30. Each time slot may have a different dining duration depending on how close it is to the end of the shift.
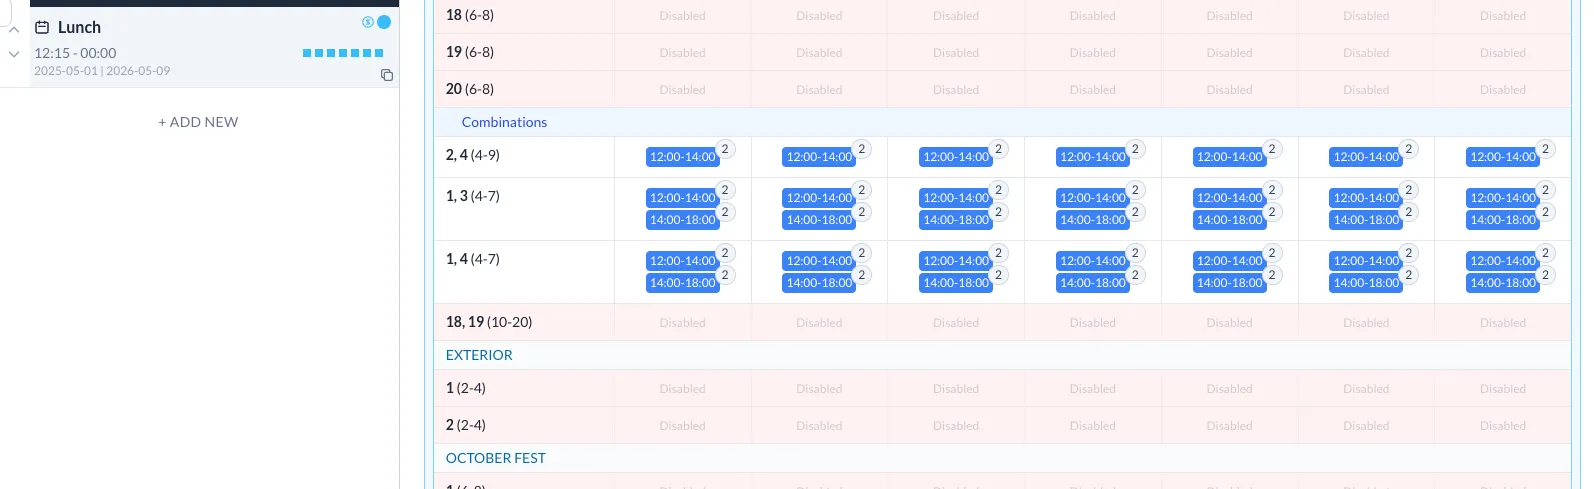
🧩 Step 3: Apply Schedules to Table Combinations
If you’re using combinations (like two tables joined together), you can also assign custom schedules for each combination in the floorplan.
Tu texto es comprensible, pero tiene algunos errores gramaticales y podría ser más claro en su estructura. Aquí tienes una versión revisada y mejorada:
⏳ Step 4: Define Time-Limited vs. Flexible Shifts
If a table has two shifts, the system will treat the first shift as time-limited, while the second shift will be open-ended.
This is clearly communicated to the guest during the booking process. Additionally, email confirmations can be customized per shift:
- First reservation: a custom email with a time limit warning
- Second reservation: the default template, with no time restriction
⏱ Reservation Duration in Custom Schedules
In a scenario where a table has two shifts and the second shift is booked first, you can configure the system to automatically extend the end time of the first reservation up to the start time of the second reservation.
This ensures the first guest receives accurate information about how long they can stay.
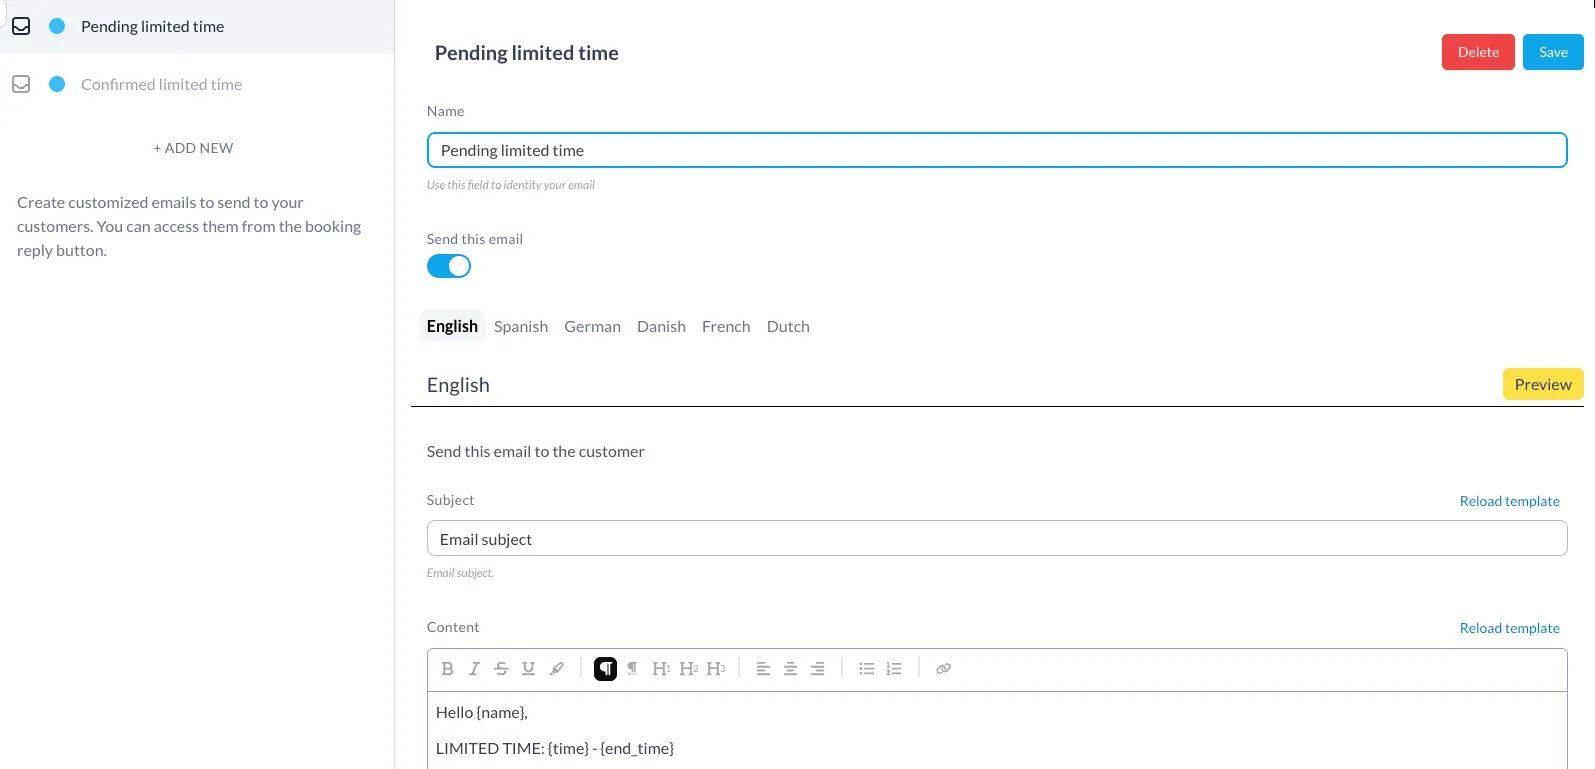
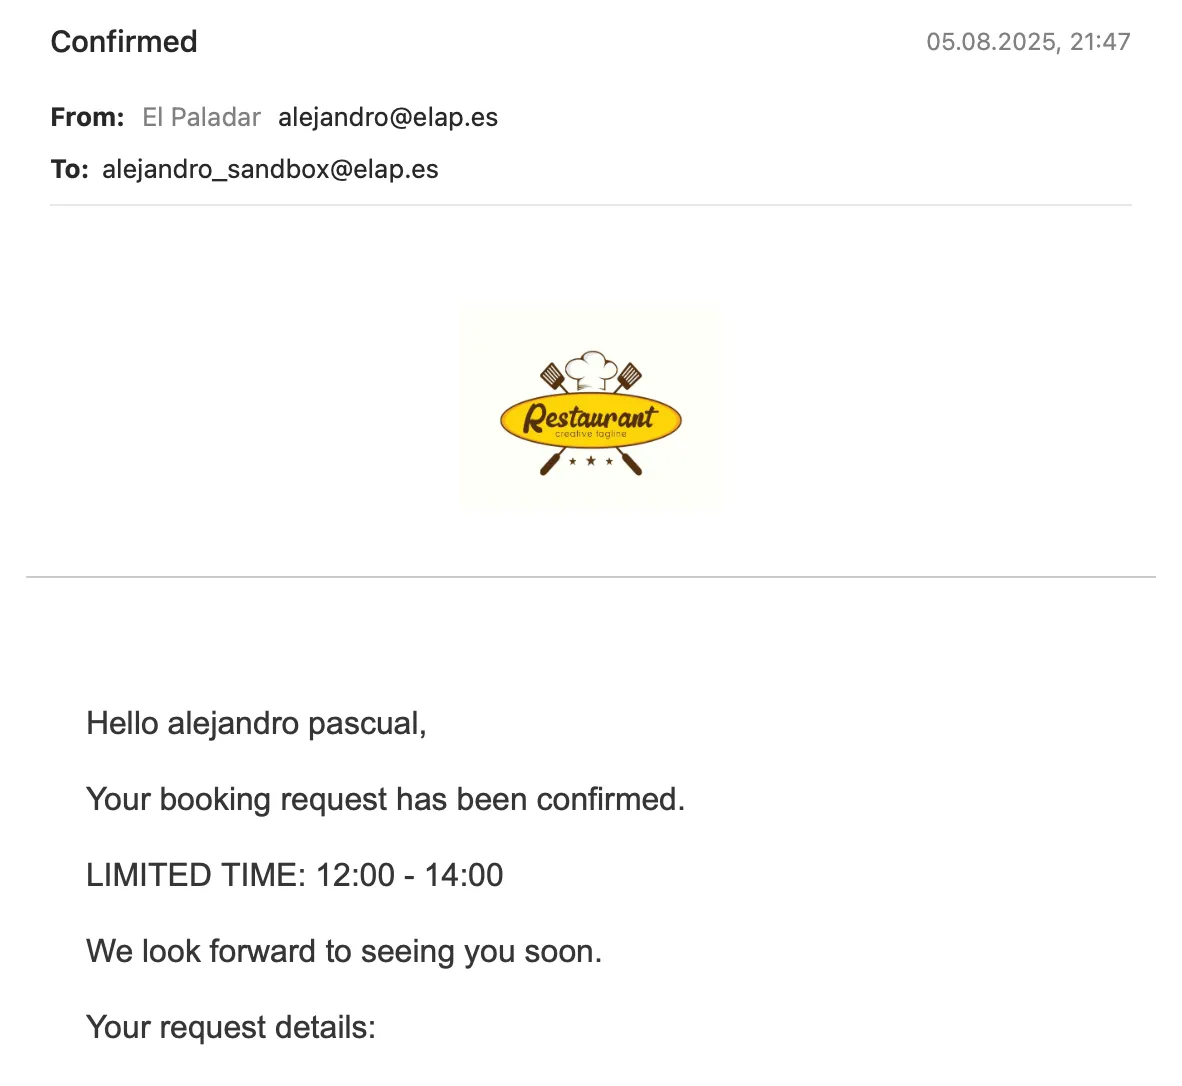
✉️ Custom Email Templates
You can define specific pending and confirmed email templates for time-limited reservations. These will be sent only when a guest books a table during the first (time-restricted) shift.
For all other reservations, the system will continue using your default email templates.
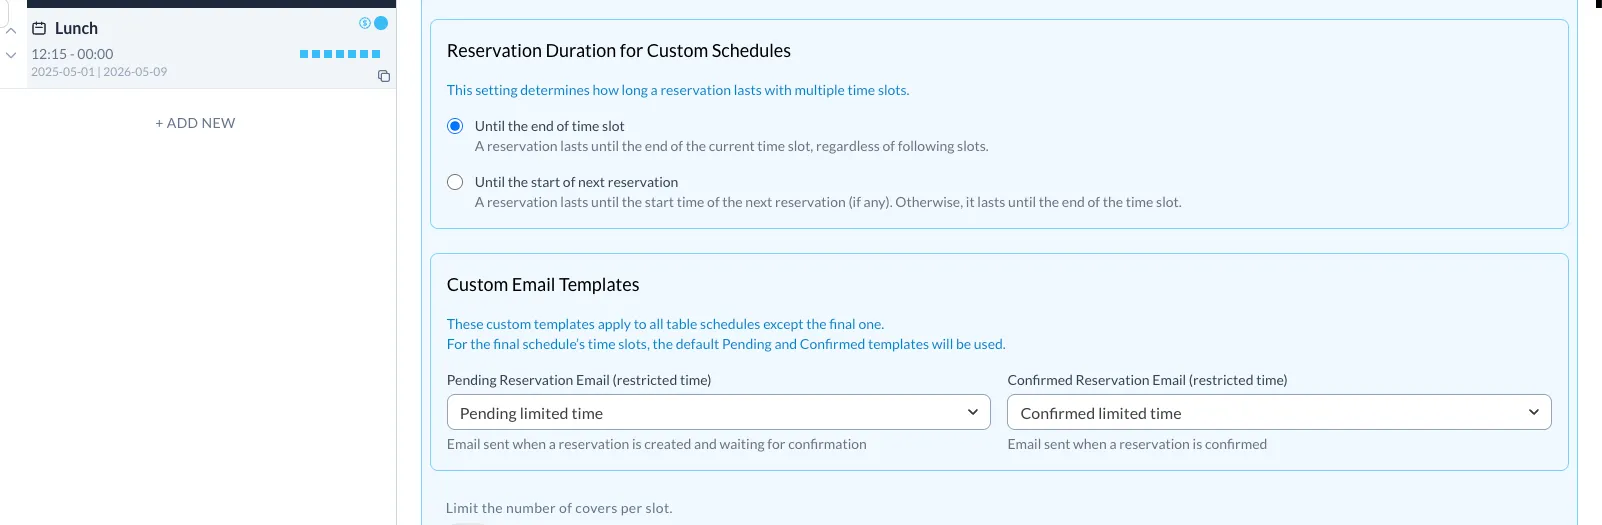
Set up custom emails for the early shifts, and keep using default emails for the last turn of each table.
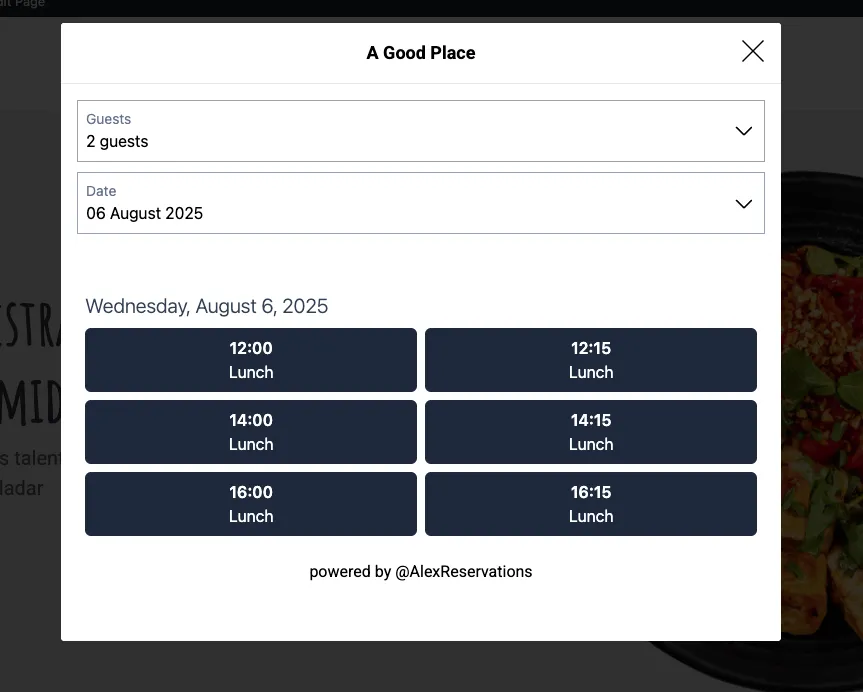
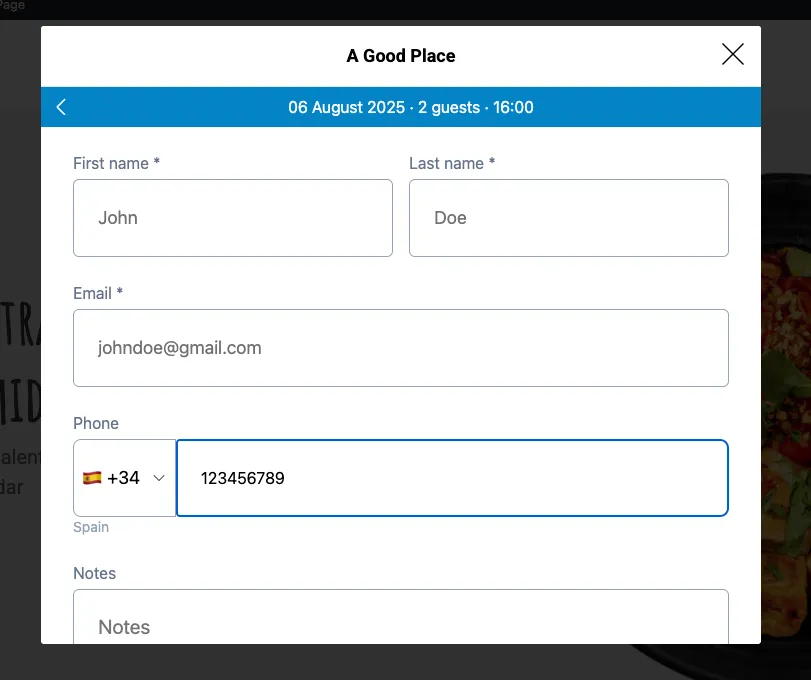
🧾 Step 5: What Guests See on the Front-End
Guests will only see available time slots based on the schedules defined per table. These slots are pulled directly from the configuration you’ve set.
⚠️ Step 6: Show Time Warnings (When Needed)
When a customer books a time-limited slot, a warning message appears in the booking form, clearly stating the dining time limit before they complete the reservation.
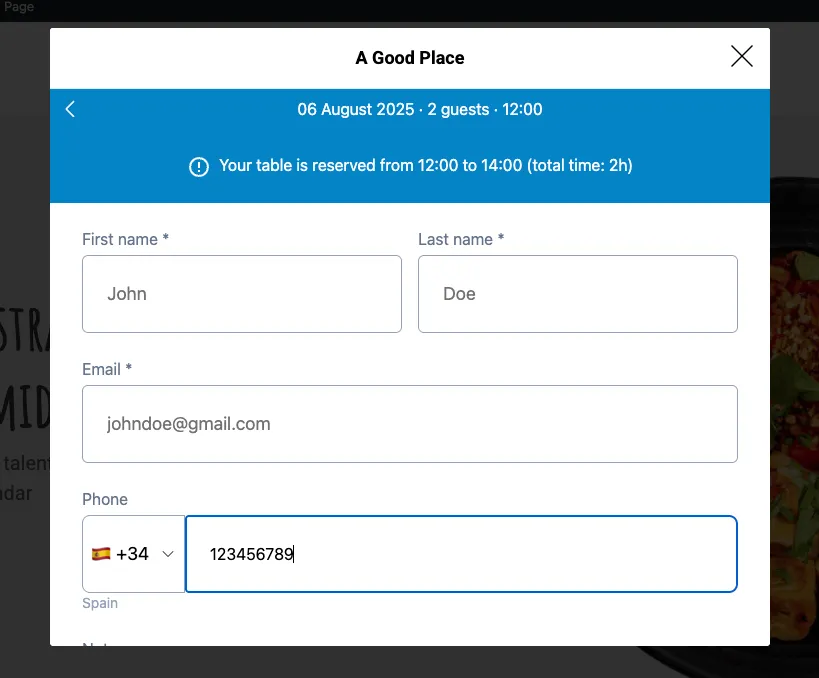
If they book the last shift, the system will not show any time warning, as the table is theirs until closing.
📧 Step 7: Use Dynamic Email Tags
In your custom email templates, use {time} and {end_time} tags to inform guests of their reserved time frame.
This helps set expectations and avoid confusion — especially when enforcing limited dining times.
✅ Summary: Why This Matters
With Table-Based Scheduling, you:
- Prevent service bottlenecks
- Customize reservation patterns per table
- Inform guests clearly and automatically
- Offer flexible or time-limited dining options
- Match your reservation system to your restaurant’s real-life needs
It’s more than scheduling—it’s smart, tailored service management.