Tables view
You can view all bookings assigned to the tables from this view.
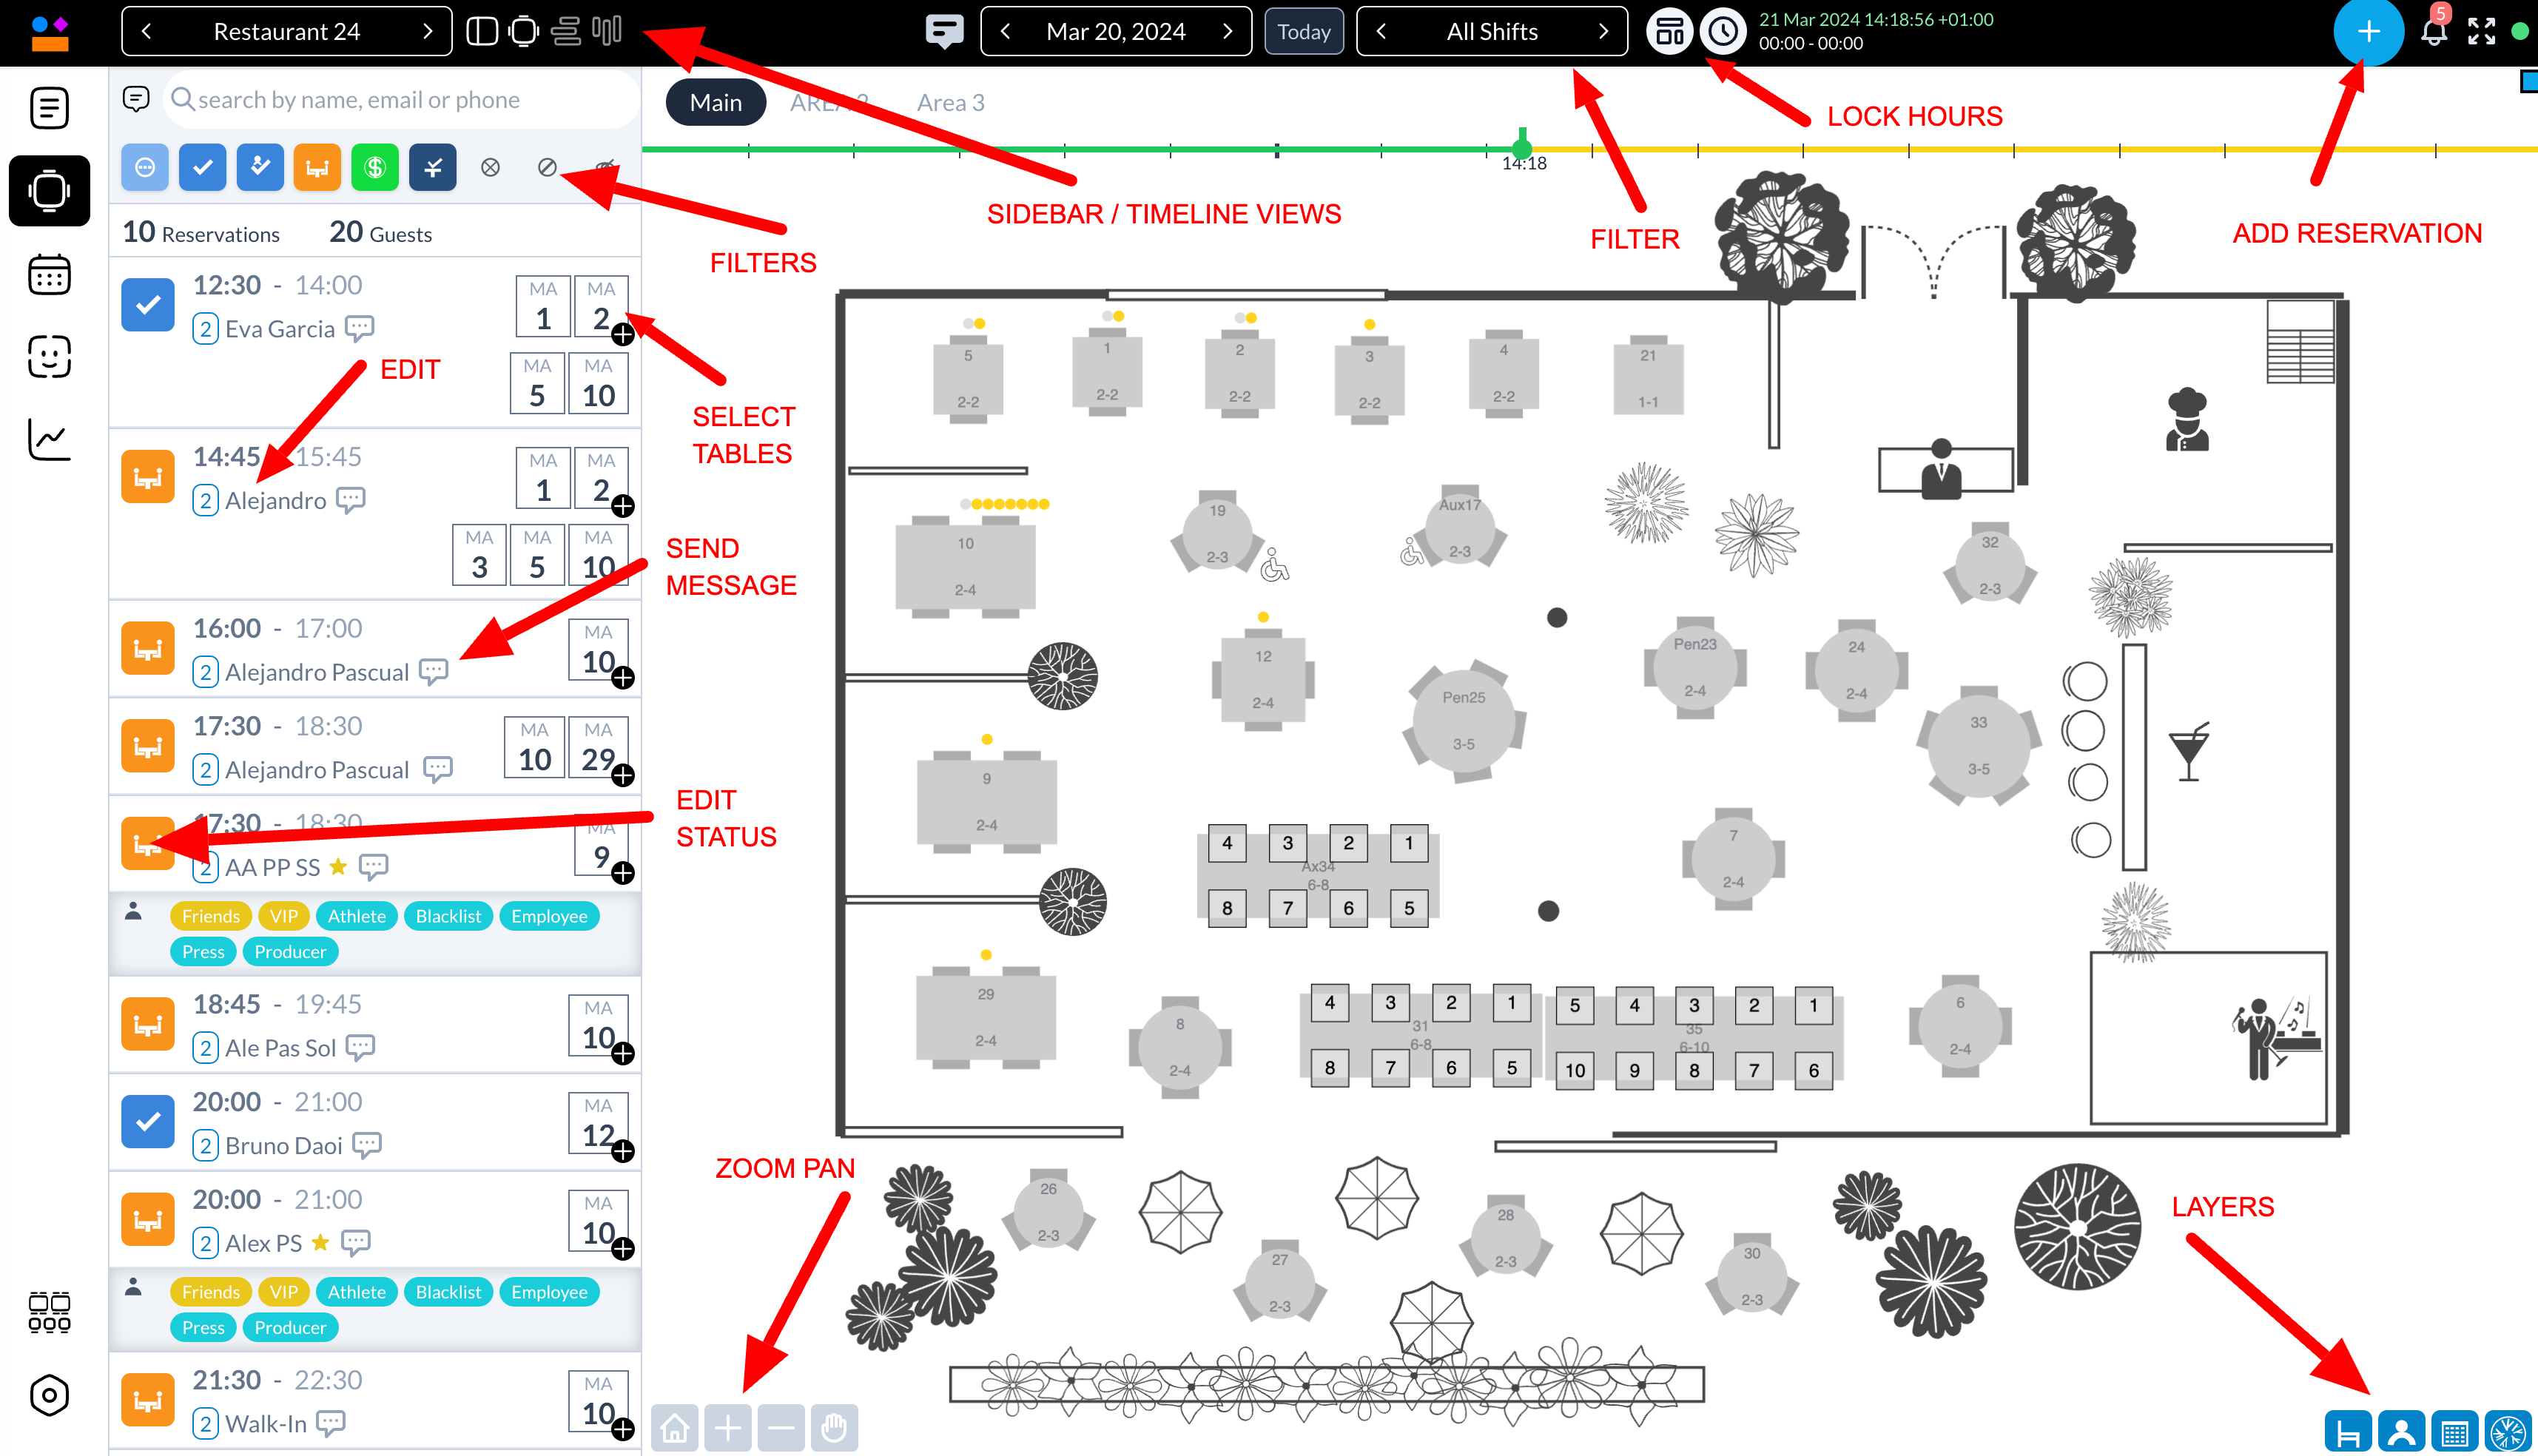
There are several ways you can edit tables assigned to a reservation from this view:
Editing Mode: Easily assign tables to reservations by entering the editing mode. Simply click on the reservation row, and next to the table number, you'll switch to edit mode. Here, you can add or remove tables from the booking. Tables available for selection are highlighted in green, while those in use are not selectable, ensuring a smoother reservation process.

Drag & Drop: Without entering edit mode, you can assign tables by dragging the plus icon next to the reservation row and dropping it onto any available (green) table, which will then turn red to indicate its selection. If a table is already assigned (red), you can remove it from the reservation by dropping the icon back onto it.

Reservation Editing: For a traditional approach, click on the reservation details with the customer's name to bring up a popup view where you can attach tables to the reservation, just as you normally would.

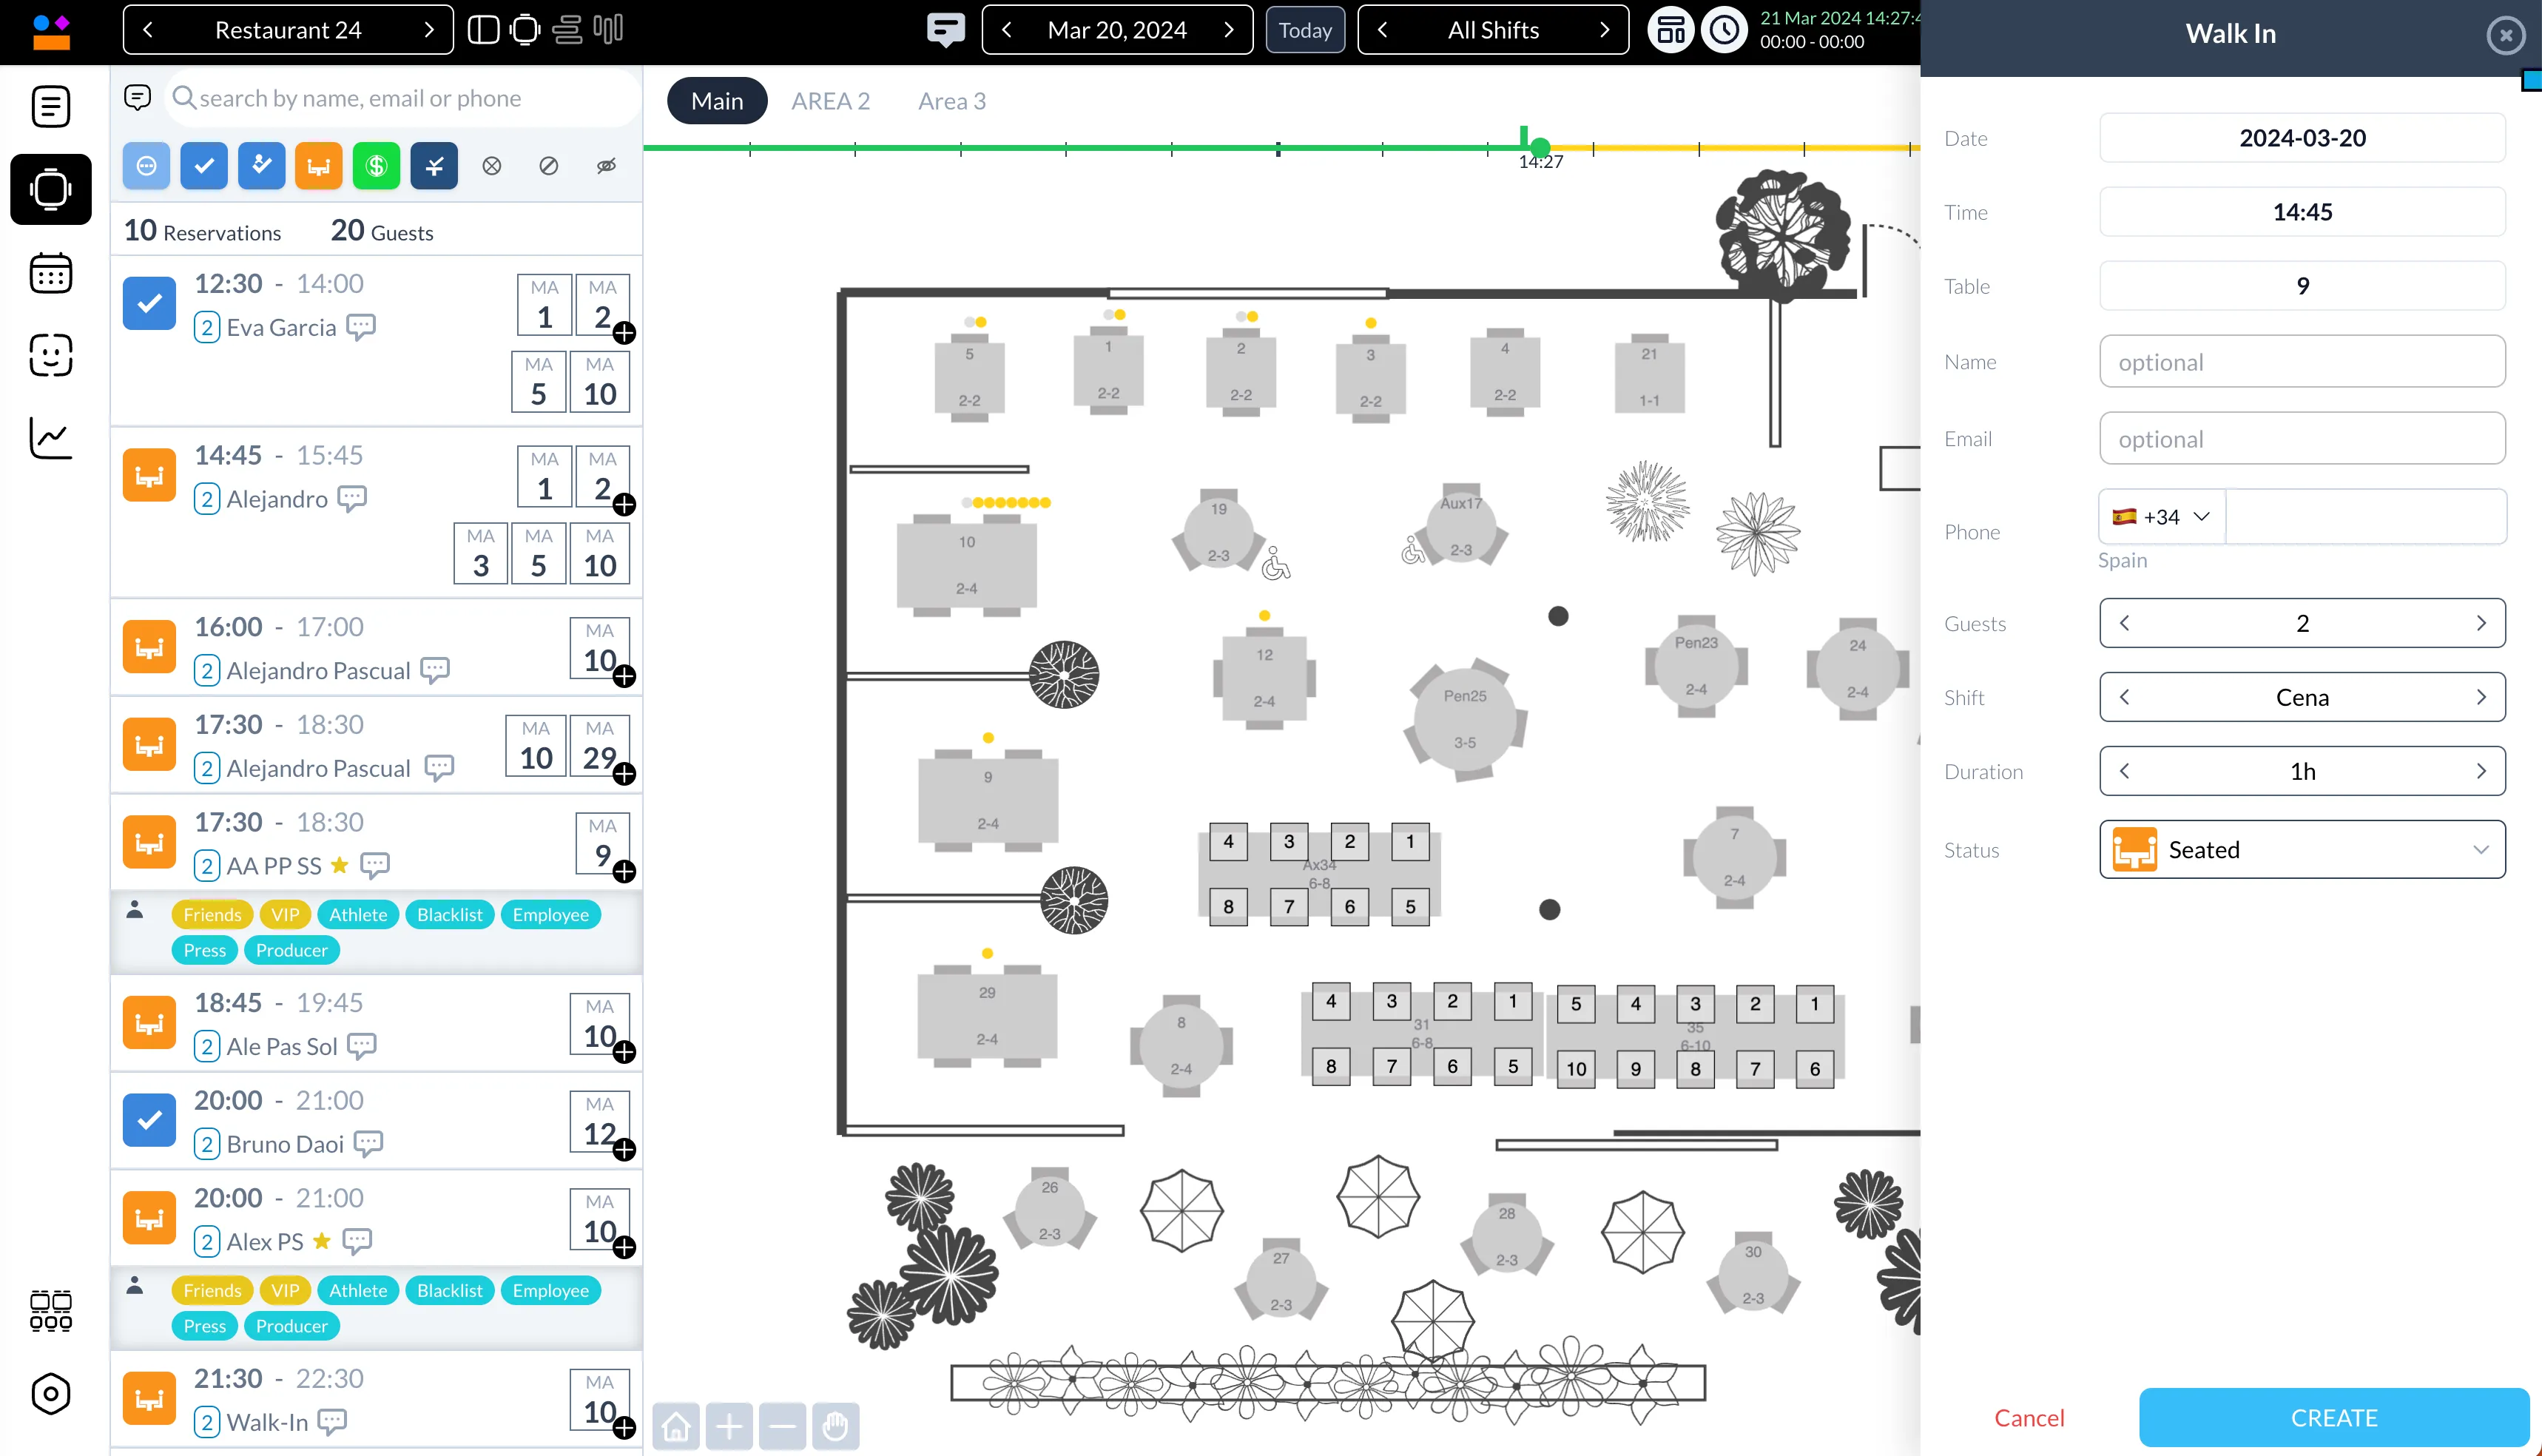
By selecting a table, you can view all bookings linked to it. This feature is especially handy for quickly adding new bookings for walk-in customers by choosing a time from the displayed list.

An icon present allows for toggling the visibility of dots atop the tables, each dot representing a booking. The color coding is as follows:
- Gray dot: indicates a past booking
- Green dot: indicates a current booking
- Black dot: indicates a future booking.

