Custom Layouts: Apply different prices per table based on location or type
Custom Layouts in Alex Reservations allow you to set different prices for each table based on zone, visibility, or category. With interactive floorplans and clickable hotspots, you give customers a visual reservation experience while managing table value and pricing flexibility.
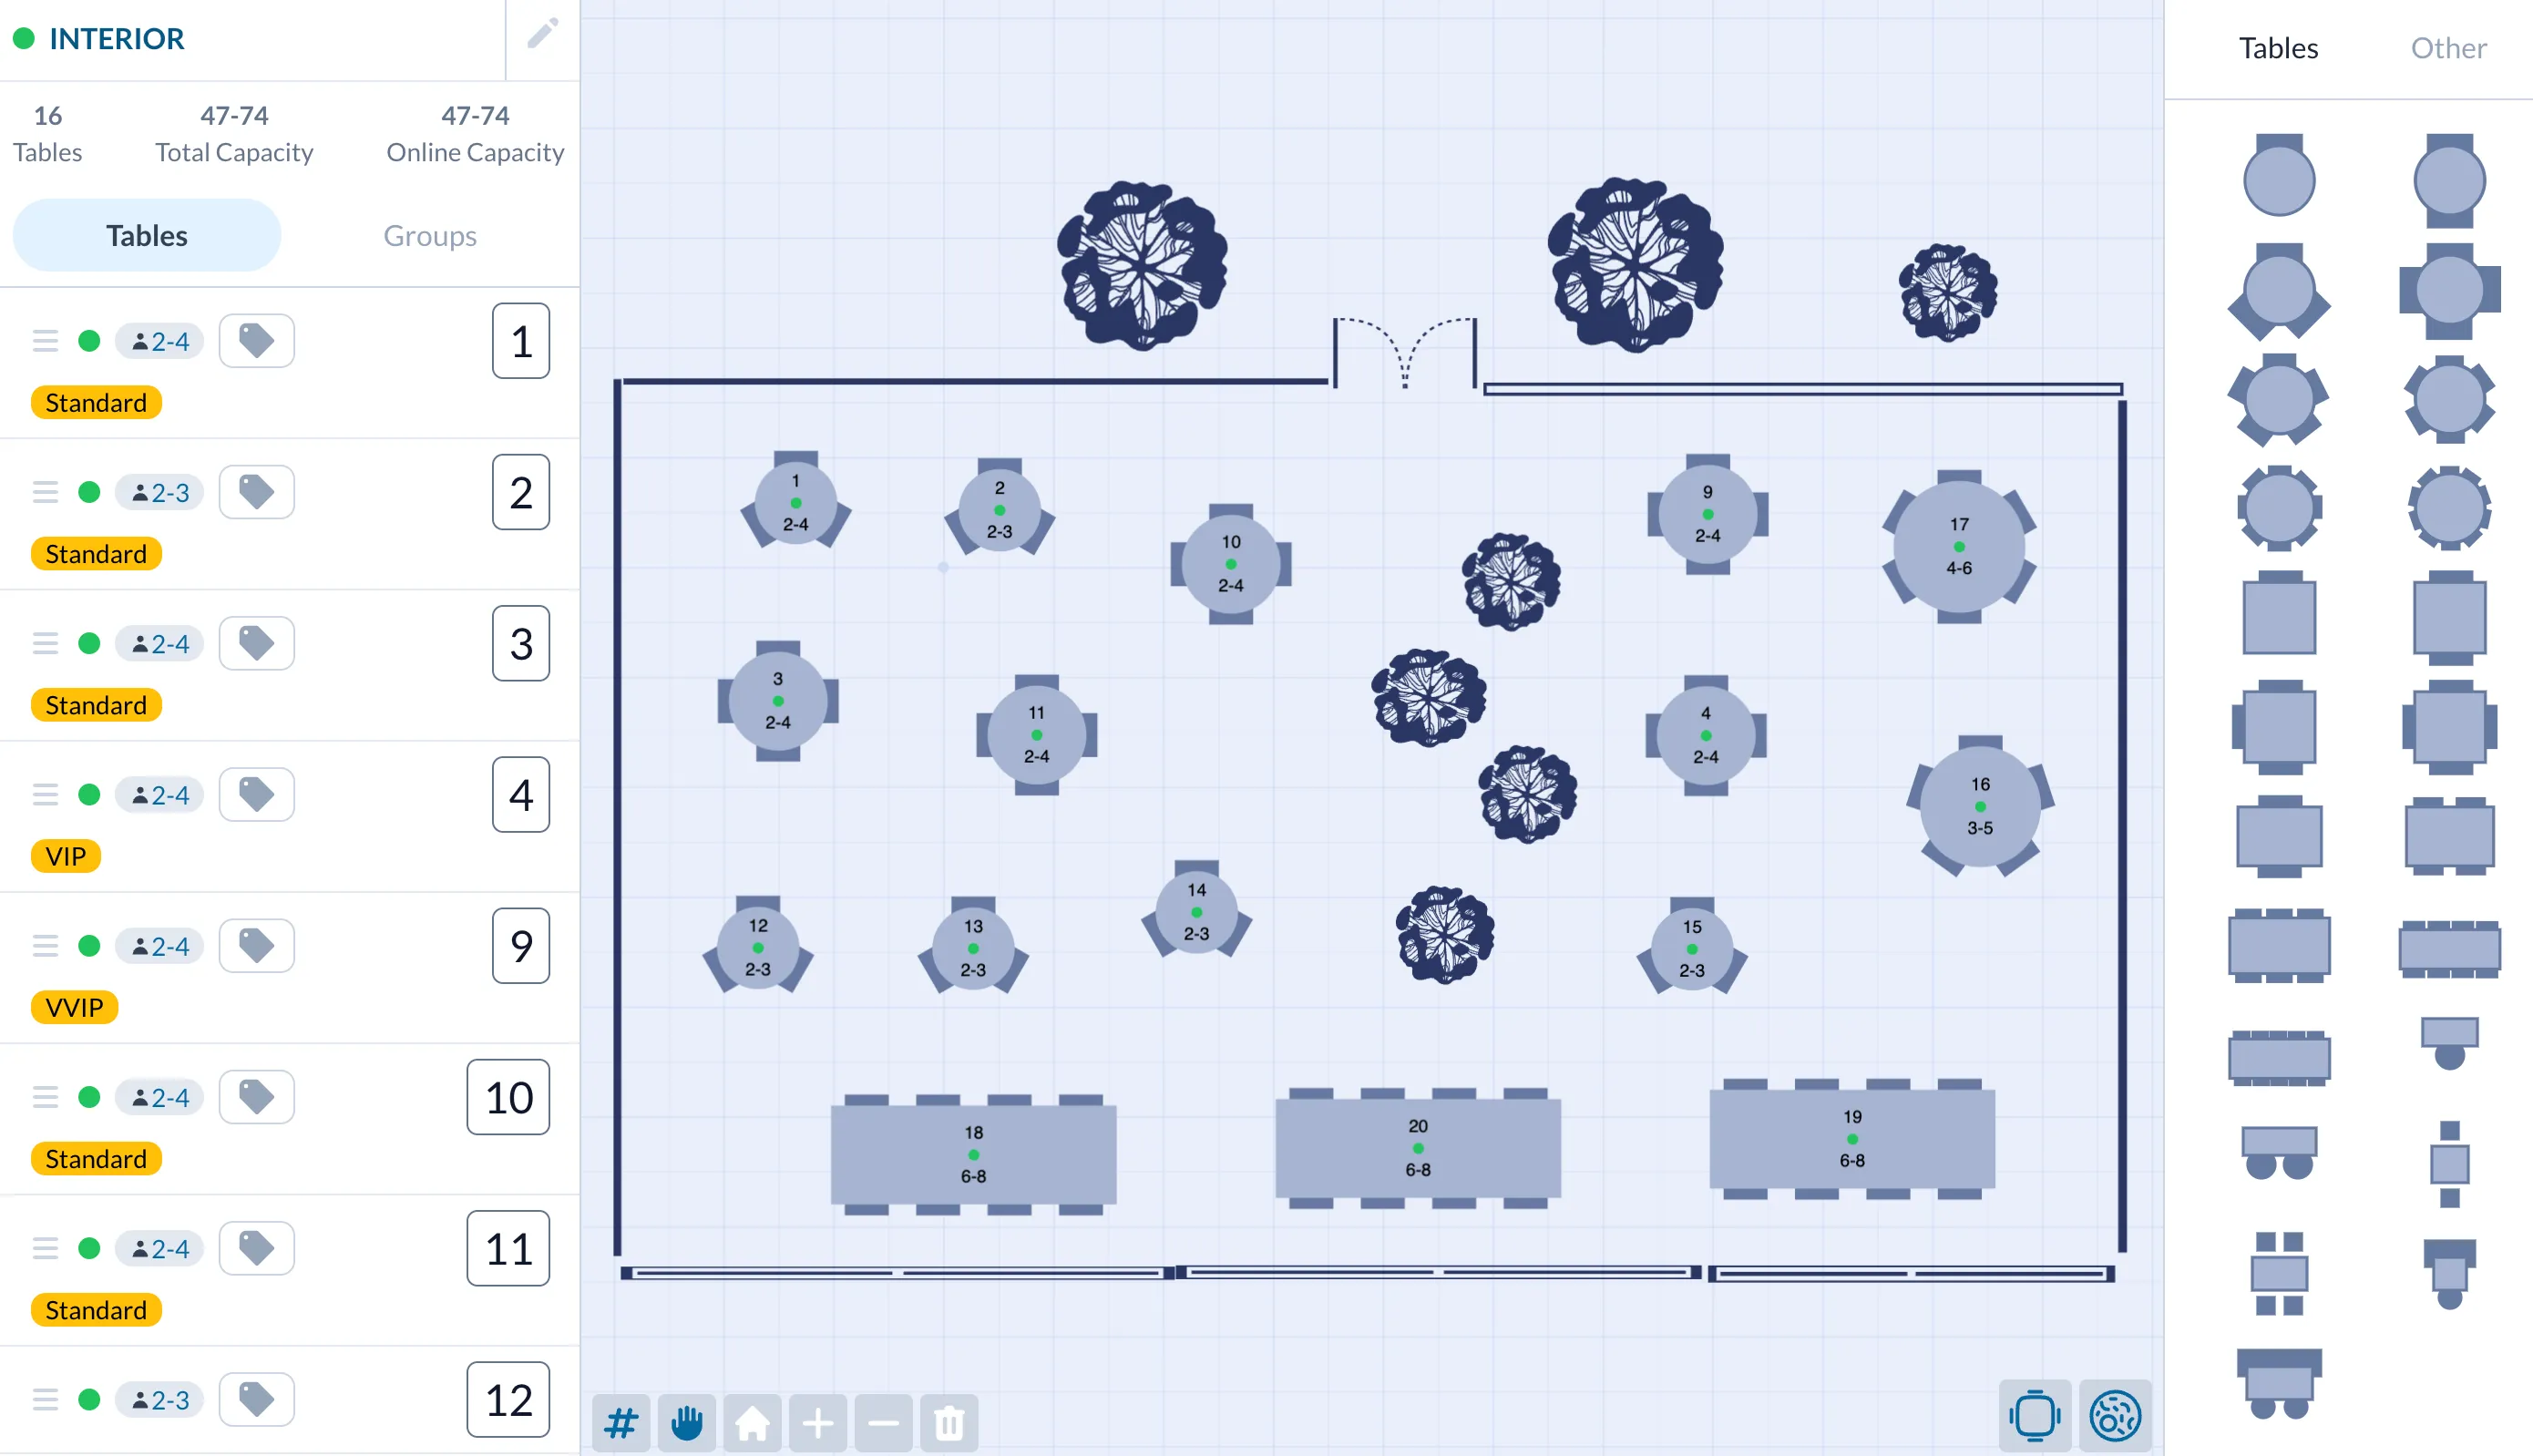
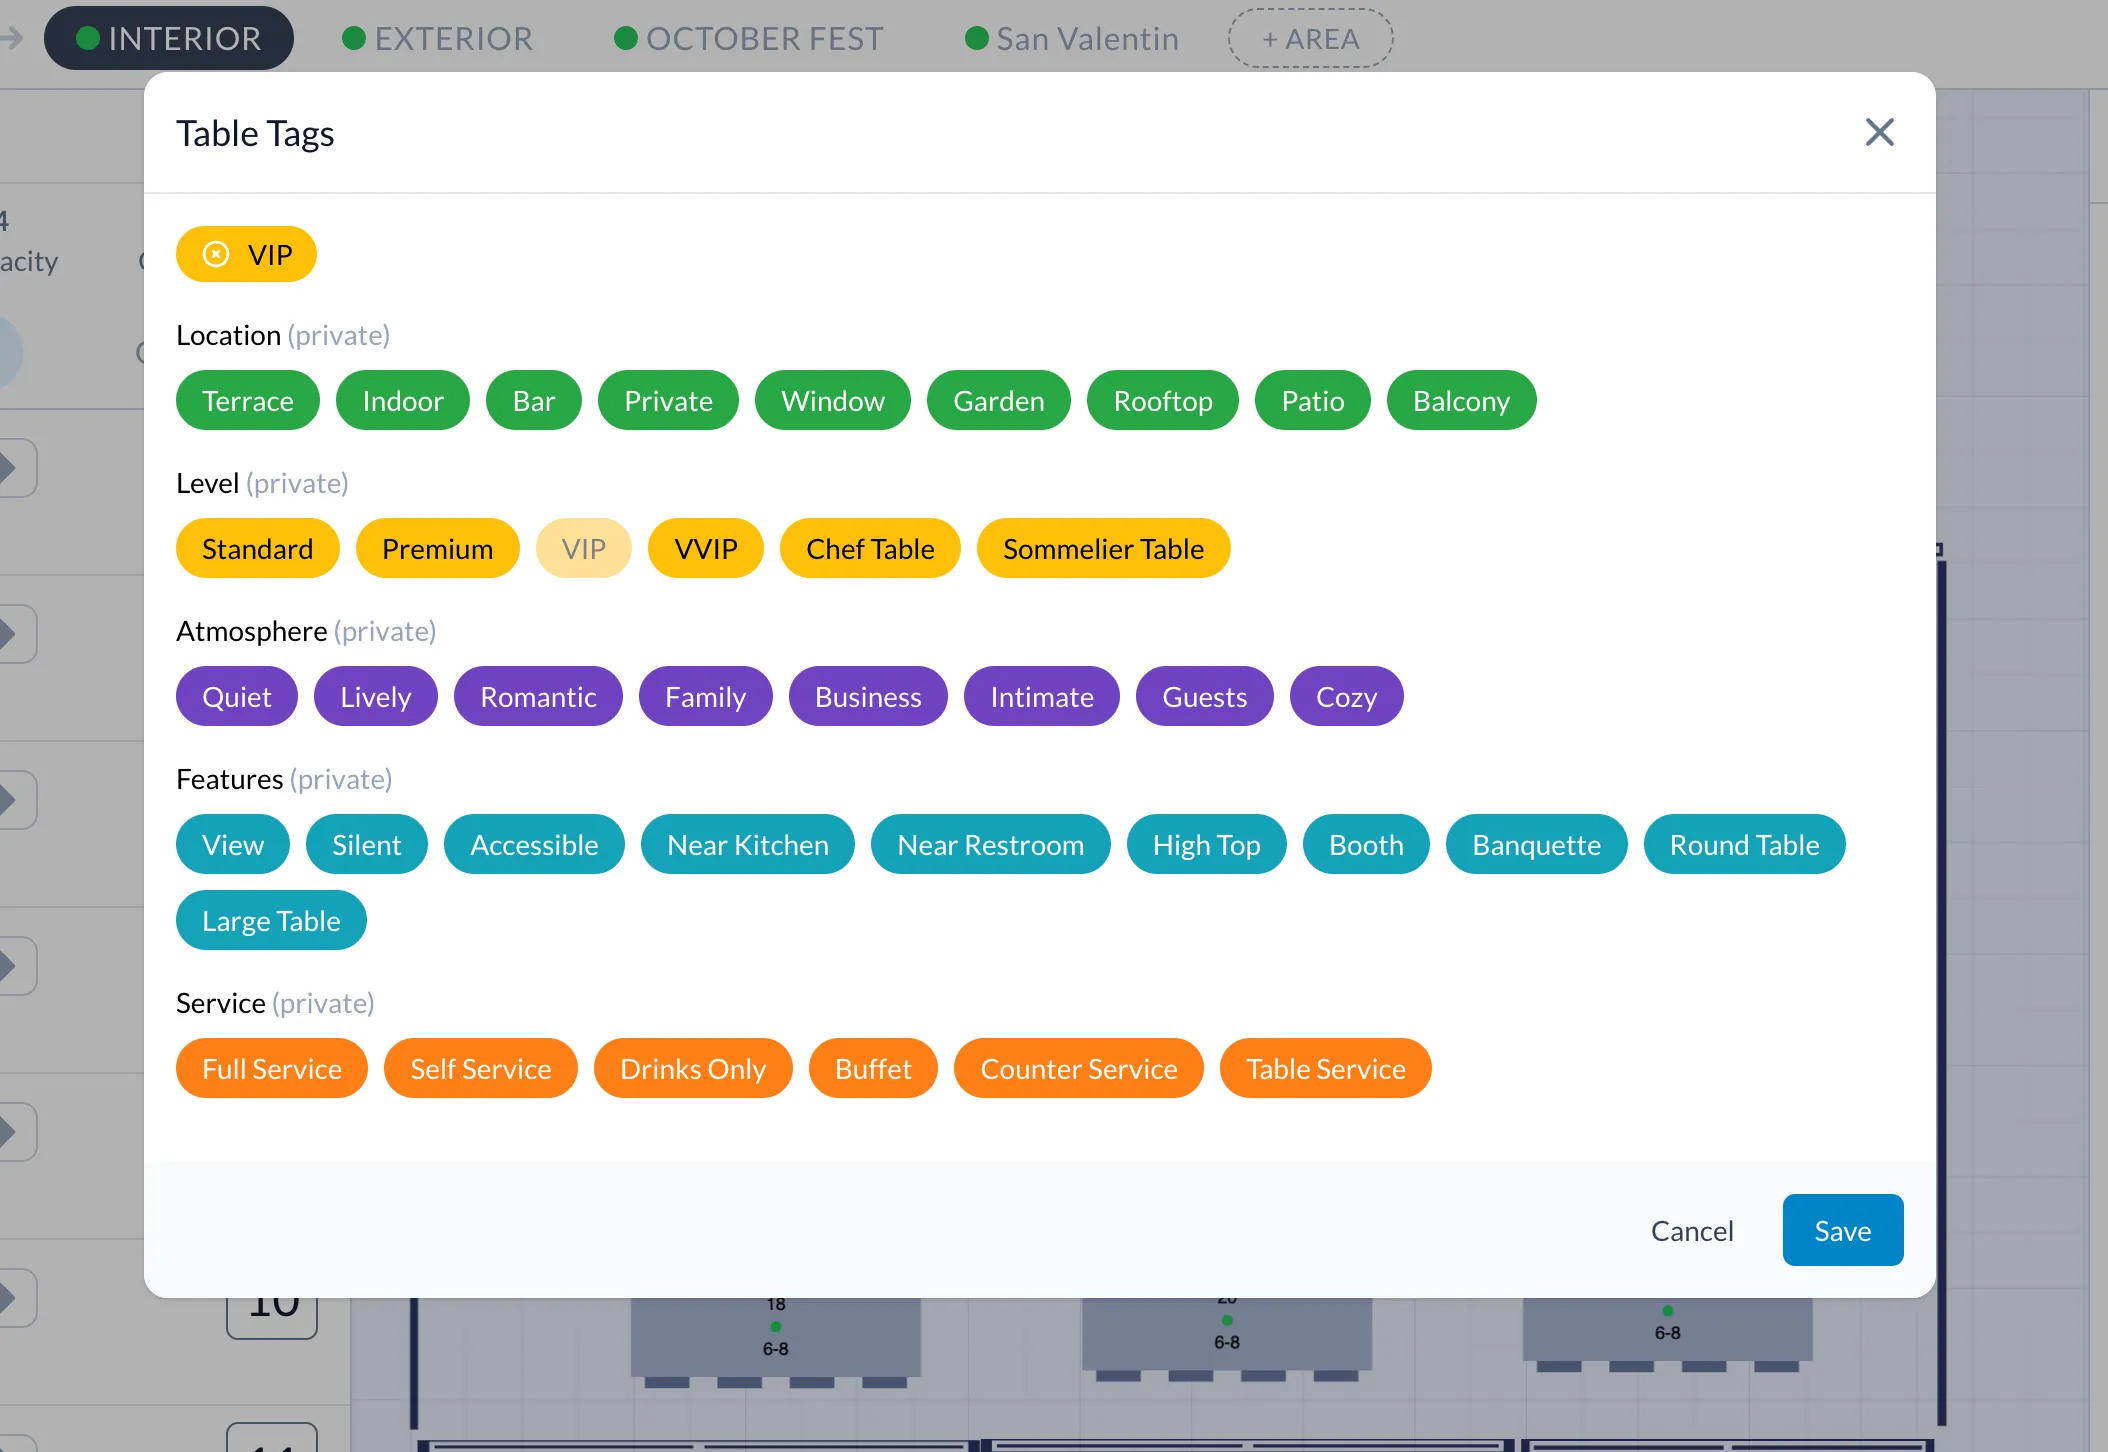
Define Table Tags for Flexible Pricing
The first step is setting up custom tags for your tables in the Floorplan Editor. Tags act as identifiers for pricing logic—examples include Window, Premium, VIP, or Terrace.
Each tag can be assigned a specific price later in the layout configuration. If a table has multiple tags, the pricing will be cumulative. For instance, a table with both "Window" (+5€) and "Premium" (+10€) tags will have a total price increase of 15€.
This setup provides granular control and enables dynamic pricing based on table desirability or location.
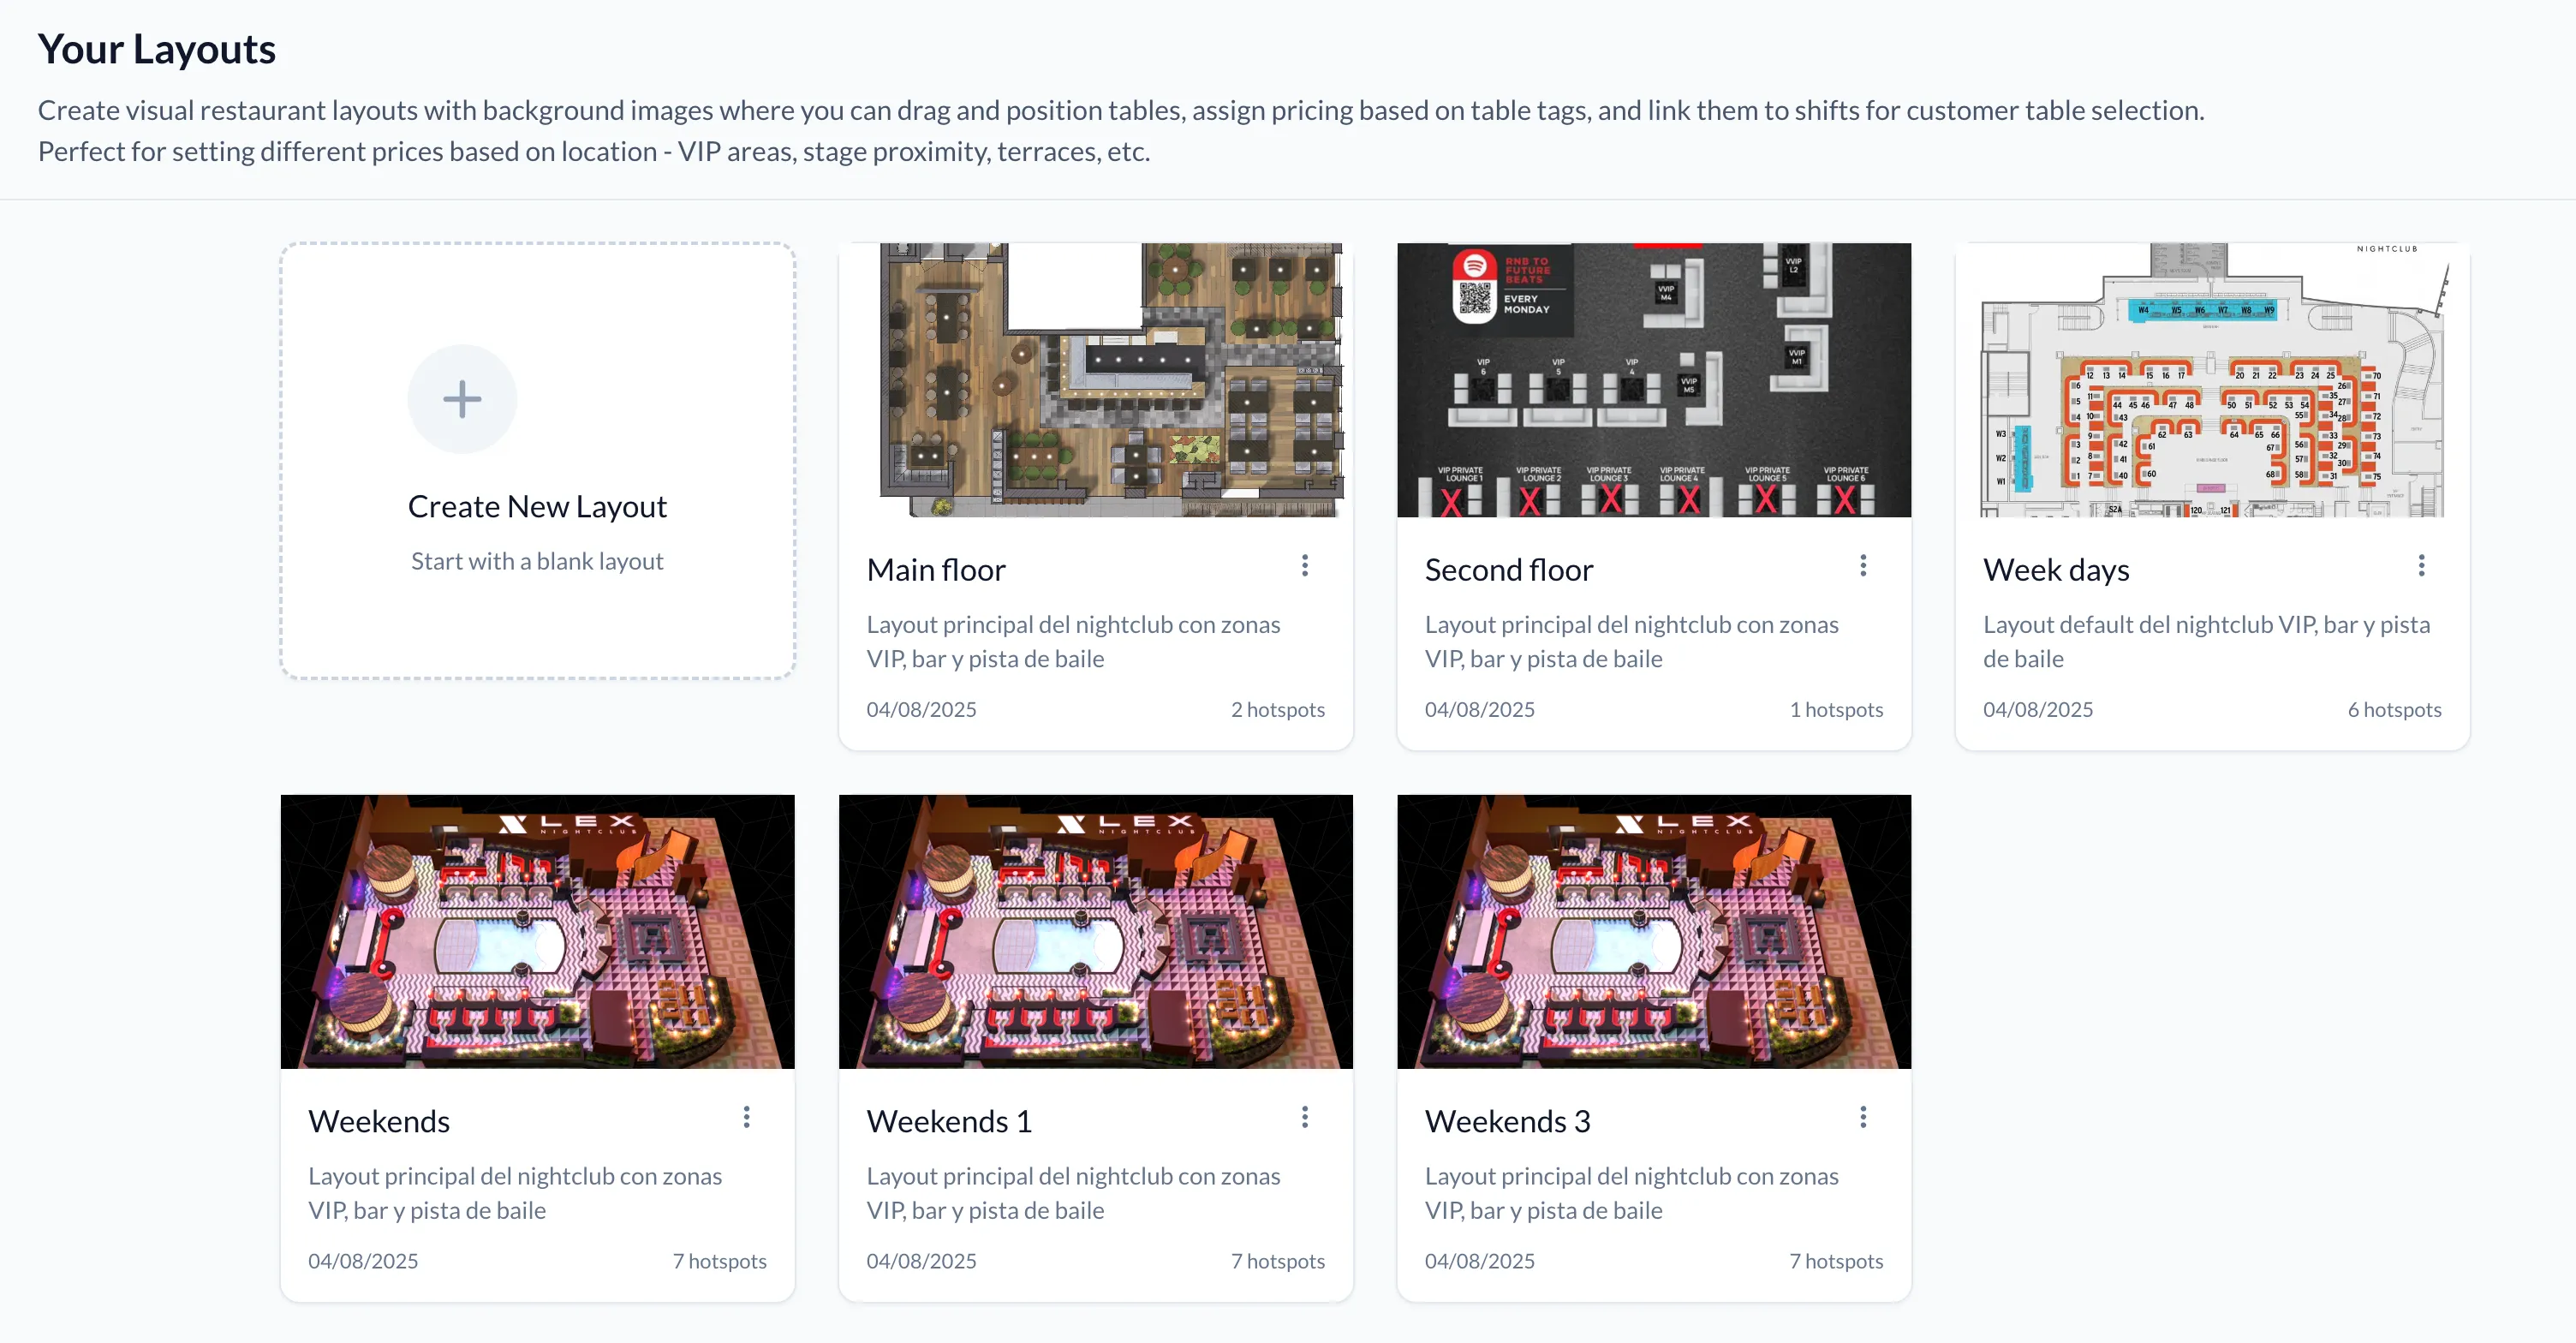
Create Multiple Layouts with Custom Backgrounds
From the Layouts Editor, you can create as many floorplans as your restaurant needs. Each layout requires:
- A name to identify it (e.g., Ground Floor, Rooftop, VIP Room).
- A description to help customers understand the layout's context.
- A background image URL, typically a top-down image of your floorplan, which will serve as the visual foundation for placing tables.
You can use different layouts for different zones, events, or time slots—making this feature especially powerful for complex venues.
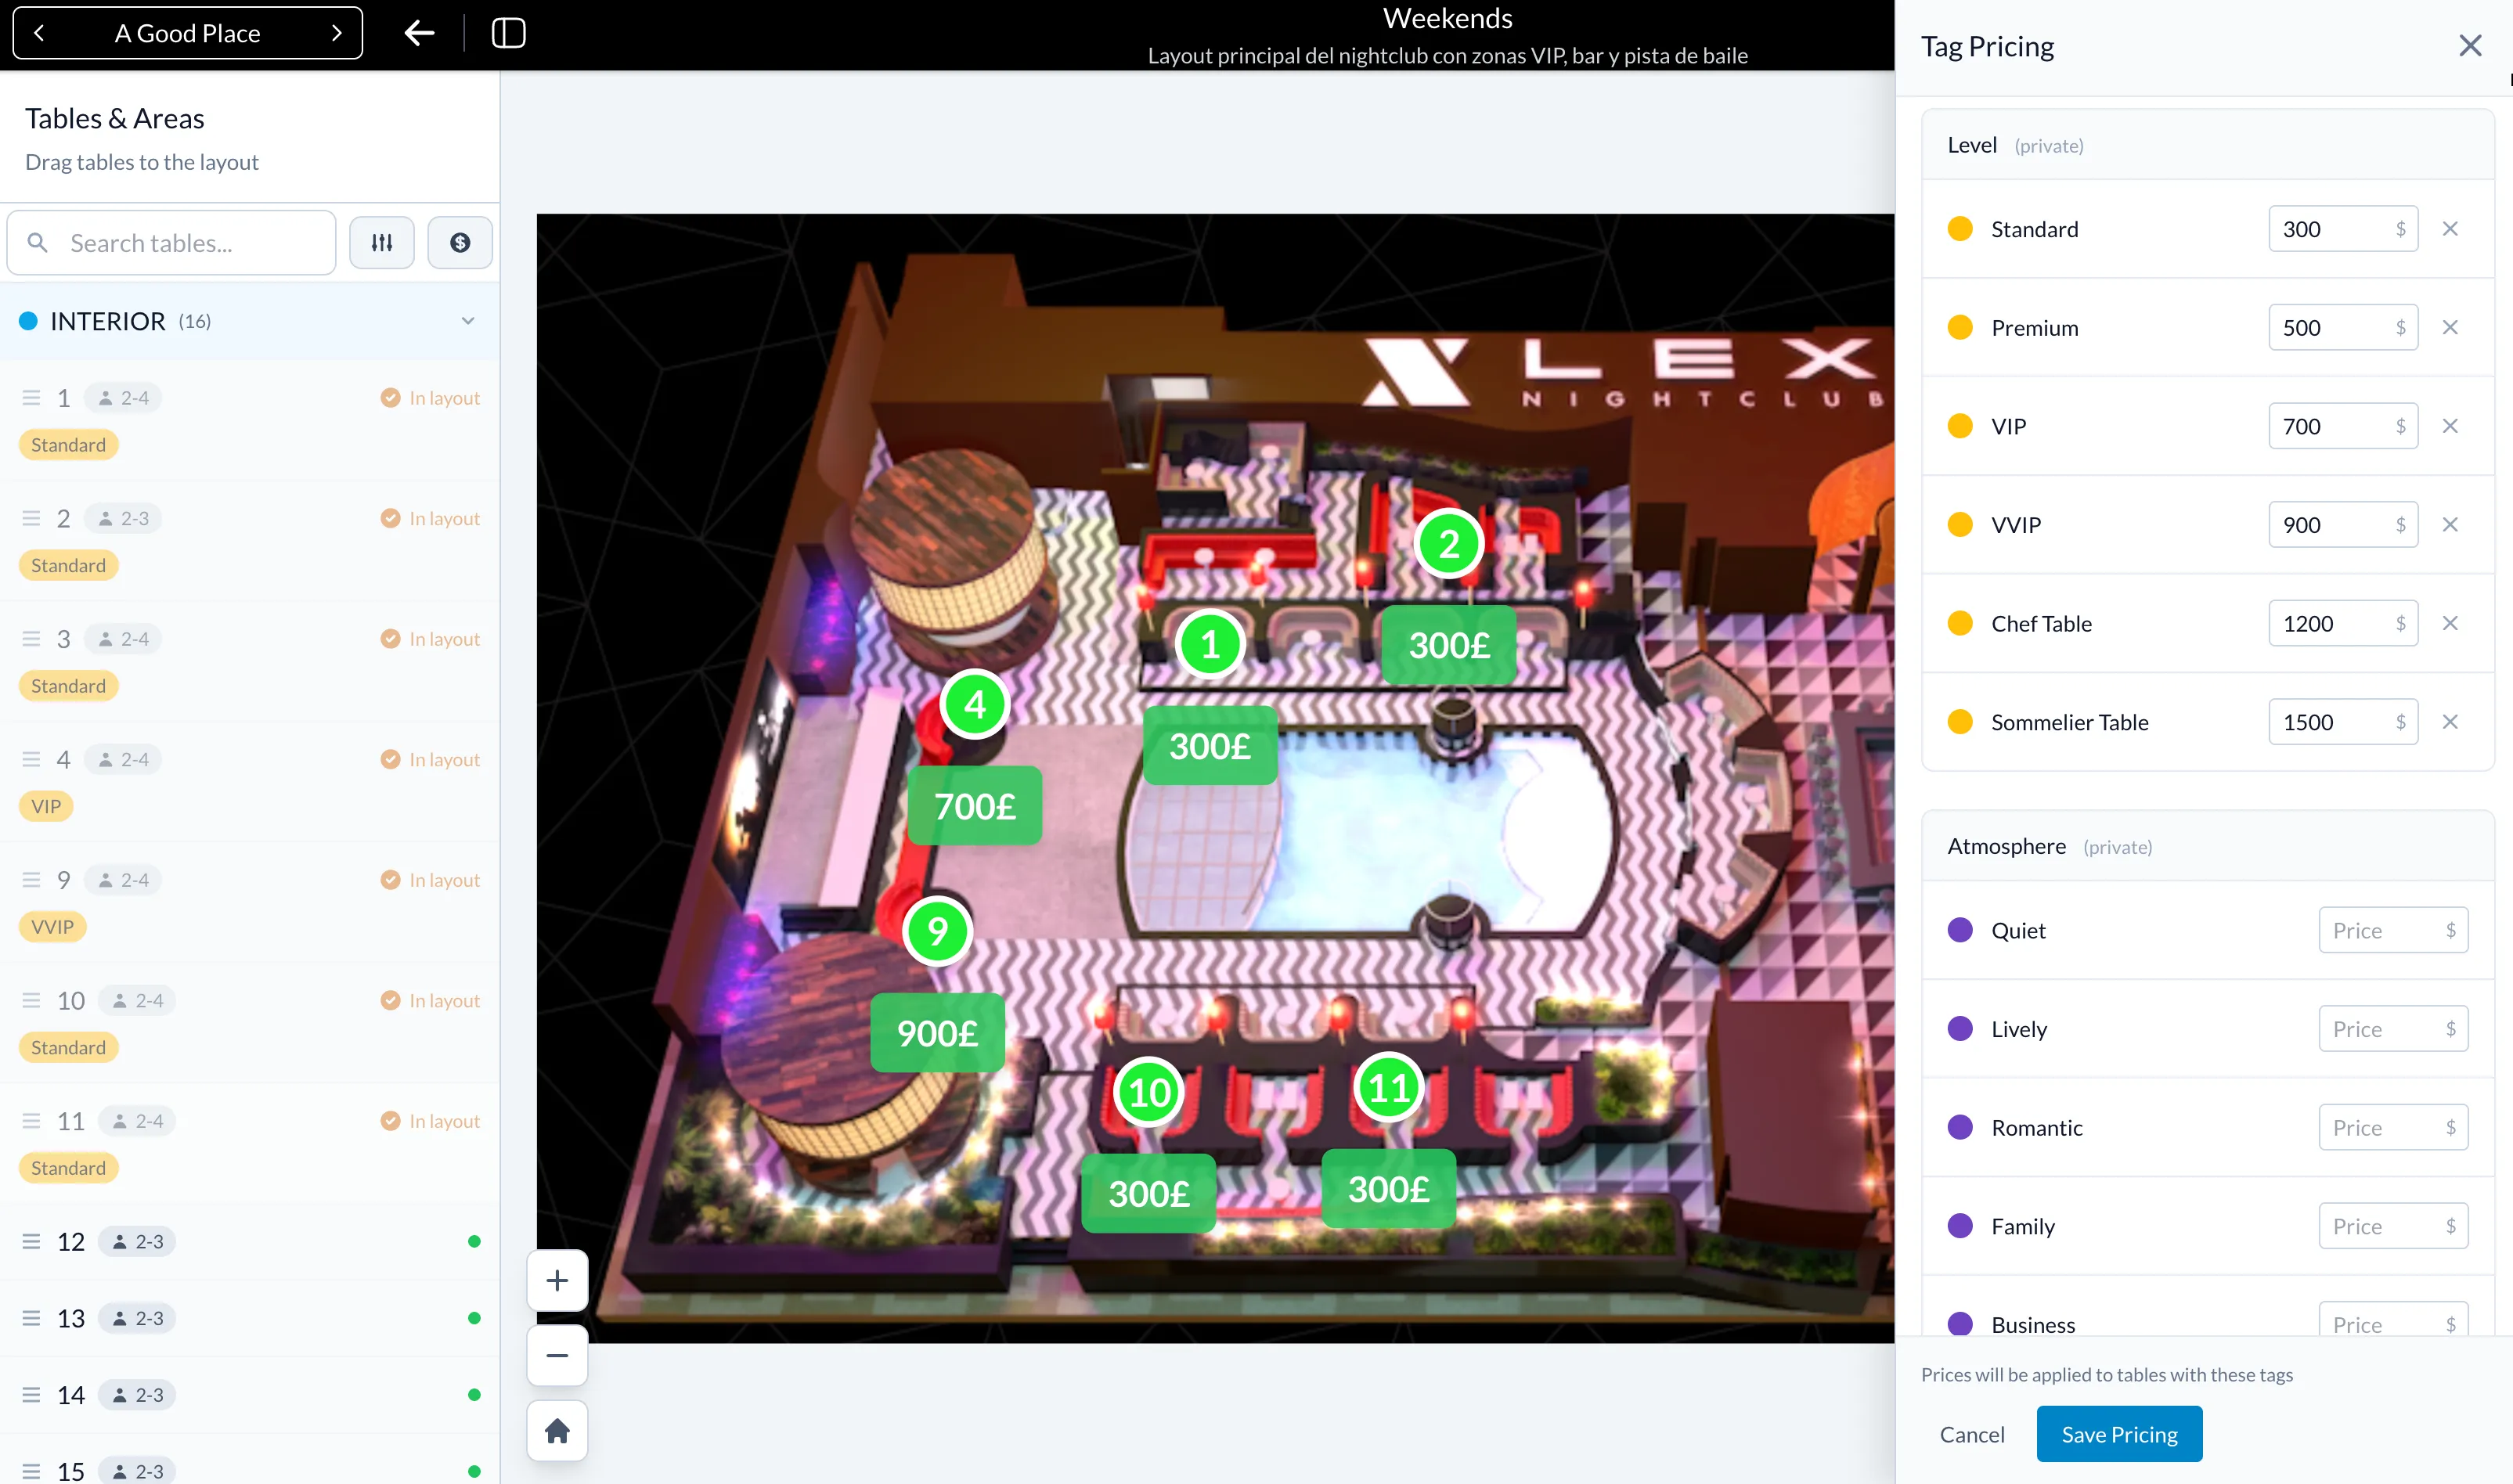
Place Tables and Assign Tag-Based Pricing
Using the visual layout editor, you can drag and drop each table onto the background image as a hotspot. Each hotspot will automatically inherit the details from the assigned table, including:
- A name or number for identification.
- Minimum and maximum number of seats.
- Any number of previously defined tags.
You can also configure a public description to be displayed to customers when they click the hotspot.
Once tags are assigned, you can define specific price values per tag within each layout. This enables flexible pricing based on the layout context—allowing the same table to have different pricing depending on the area, shift, or event.
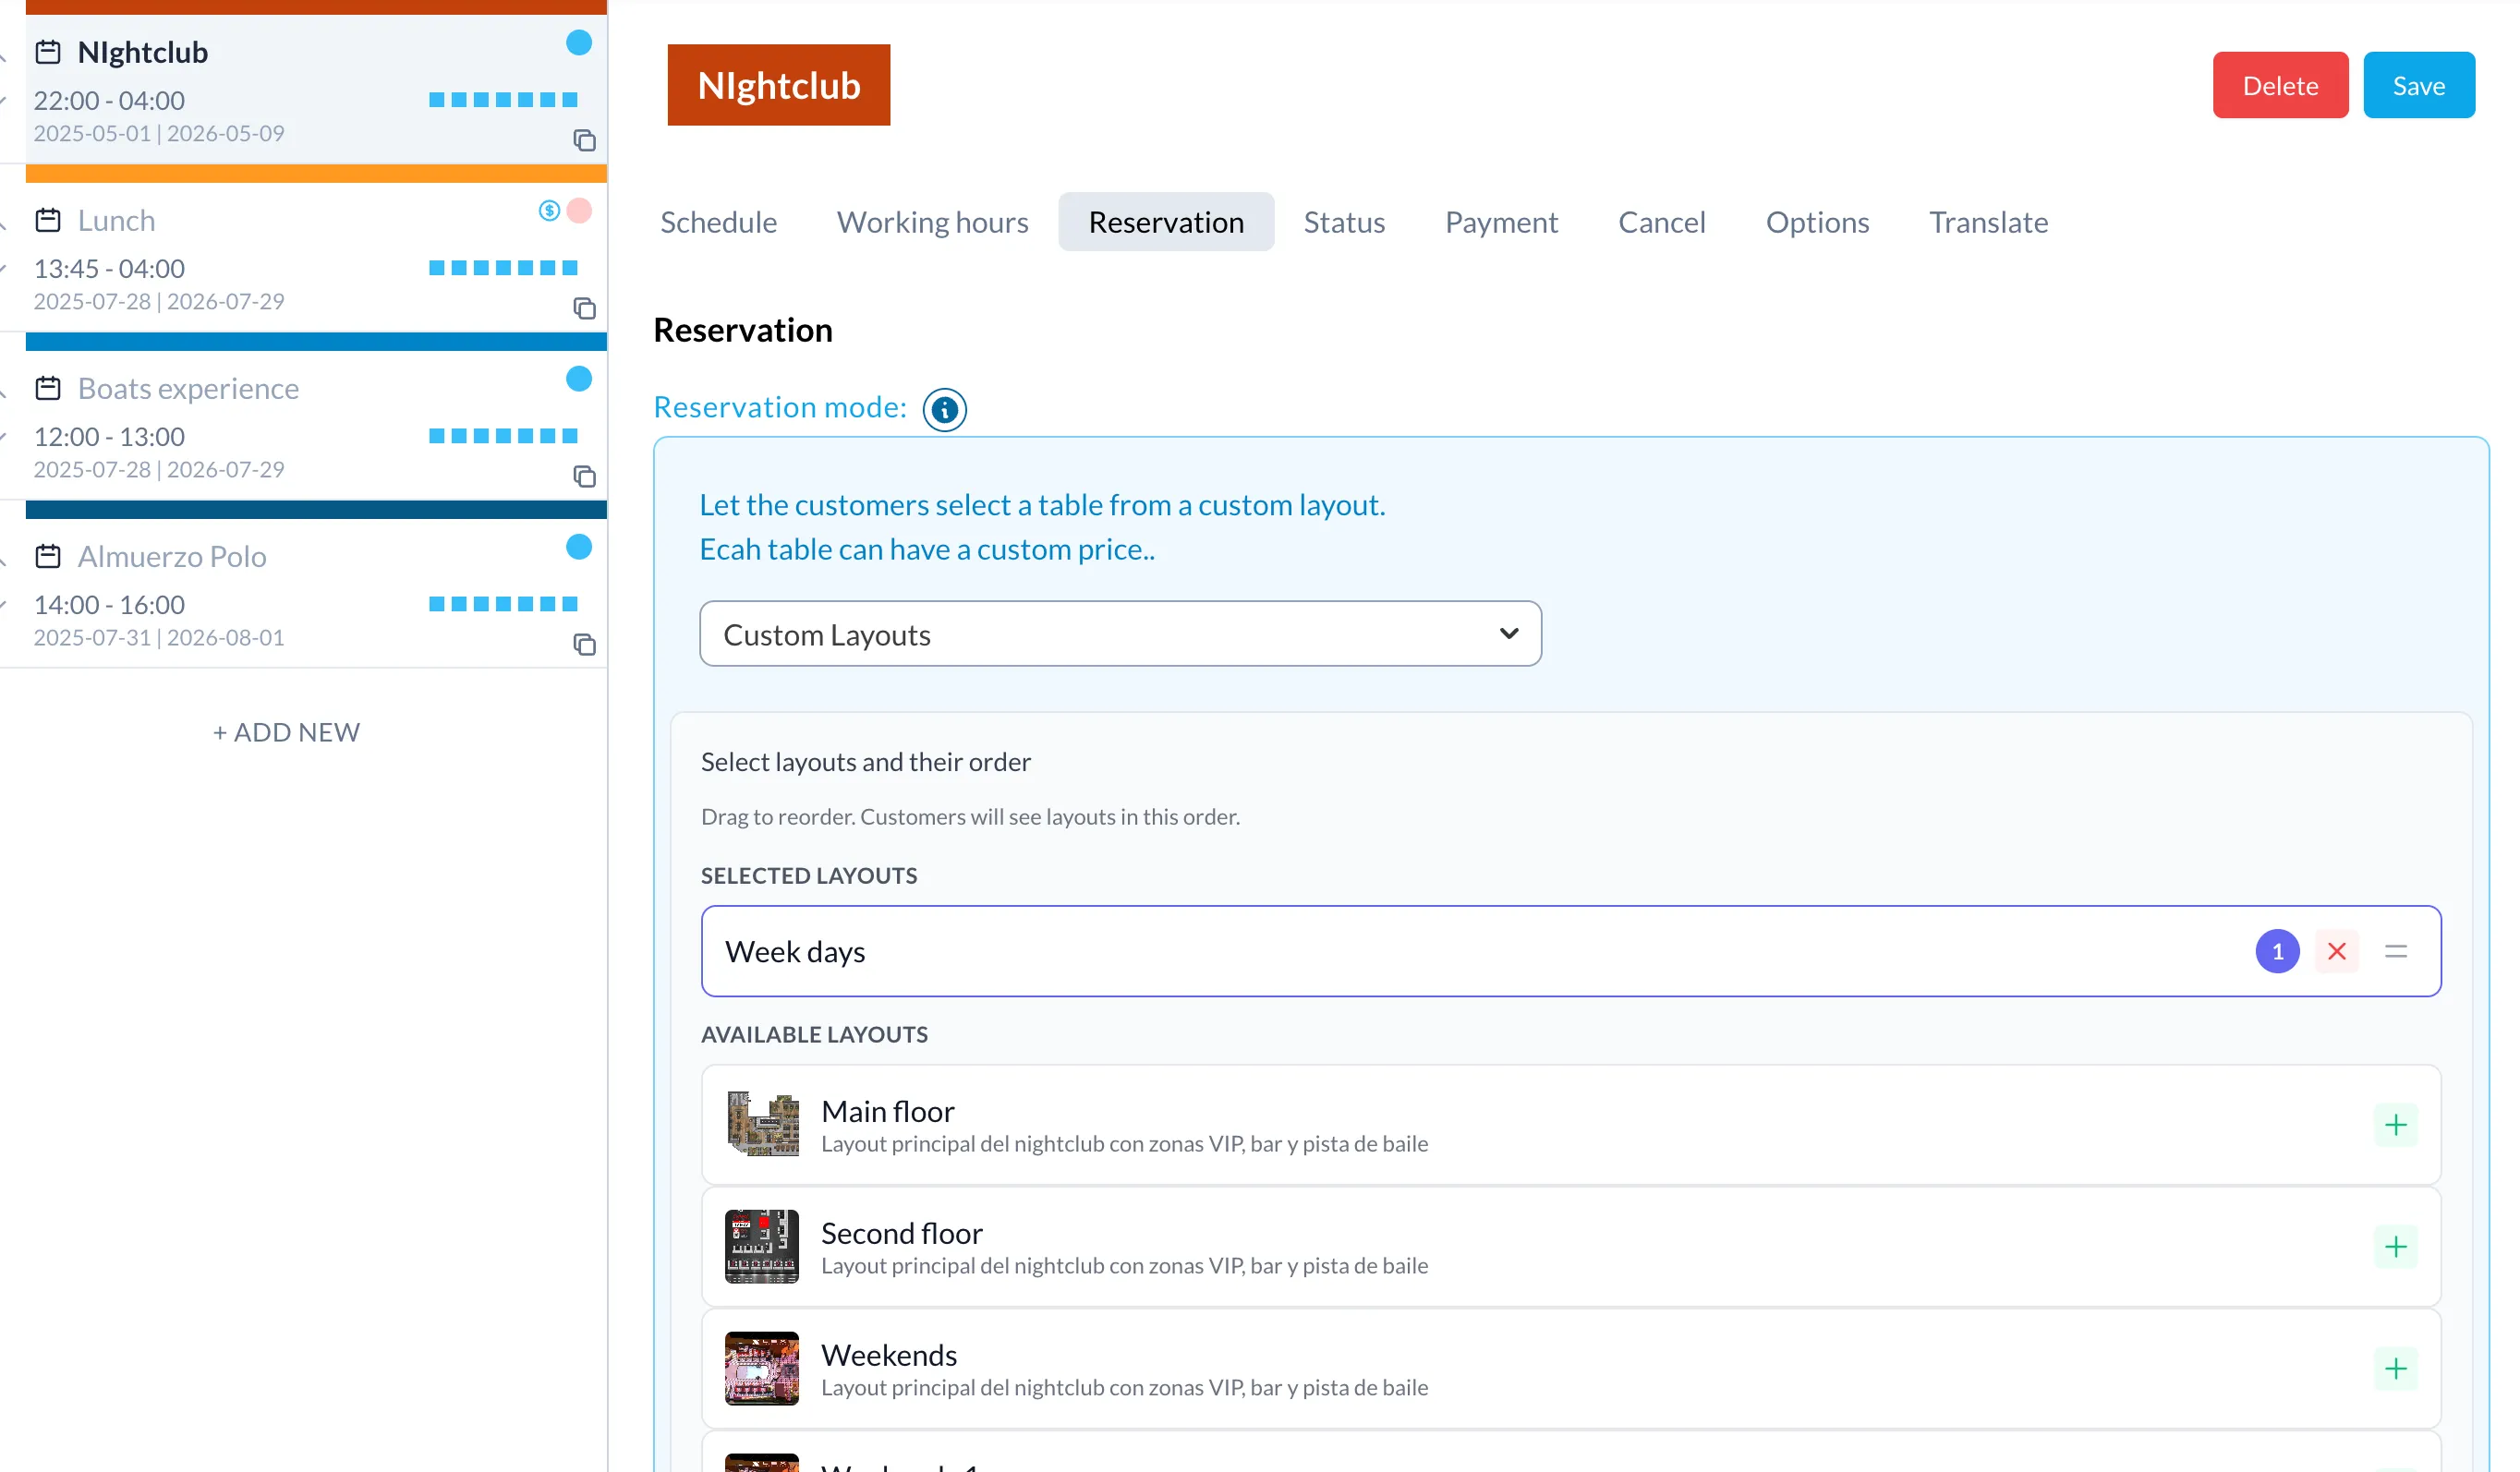
Enable Layouts in Reservation Shifts
To use Custom Layouts on the front-end, go to the Shift Settings and choose "Custom Layouts" as the reservation mode.
From there, assign one or more layouts to be available for that shift. This makes it possible to show different layouts depending on the time, day, or type of service.
For example, a dinner shift could use a different layout than a lunch shift, or a Friday night event might unlock a VIP seating layout.
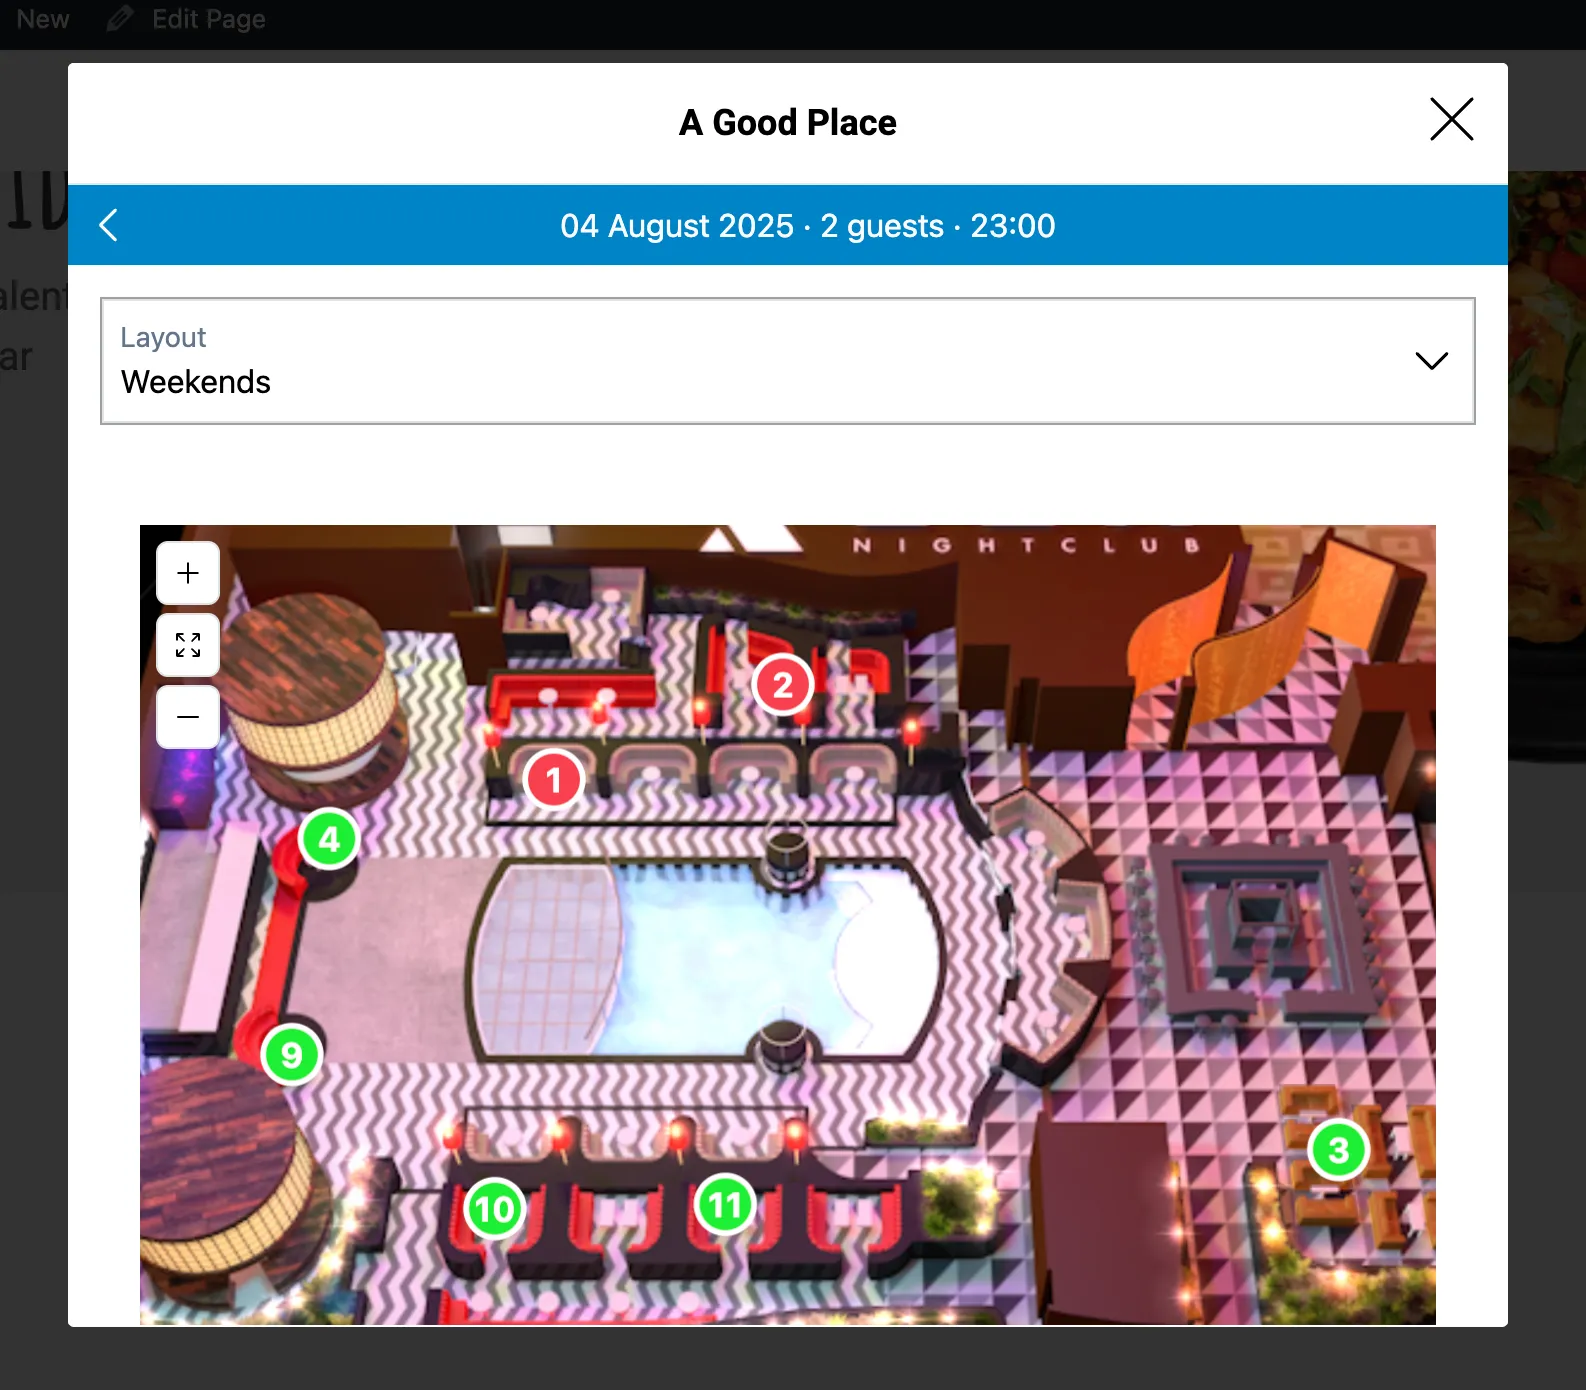
Customer-Facing Table Selection Interface
When customers access the reservation form, they’ll see the available floorplan layouts with interactive hotspots for each table.
Guests can:
- Switch between available layouts.
- View details for each table.
- Select their preferred spot with a single click.
This process not only improves user experience but also reduces friction and support inquiries by making table selection transparent and intuitive.
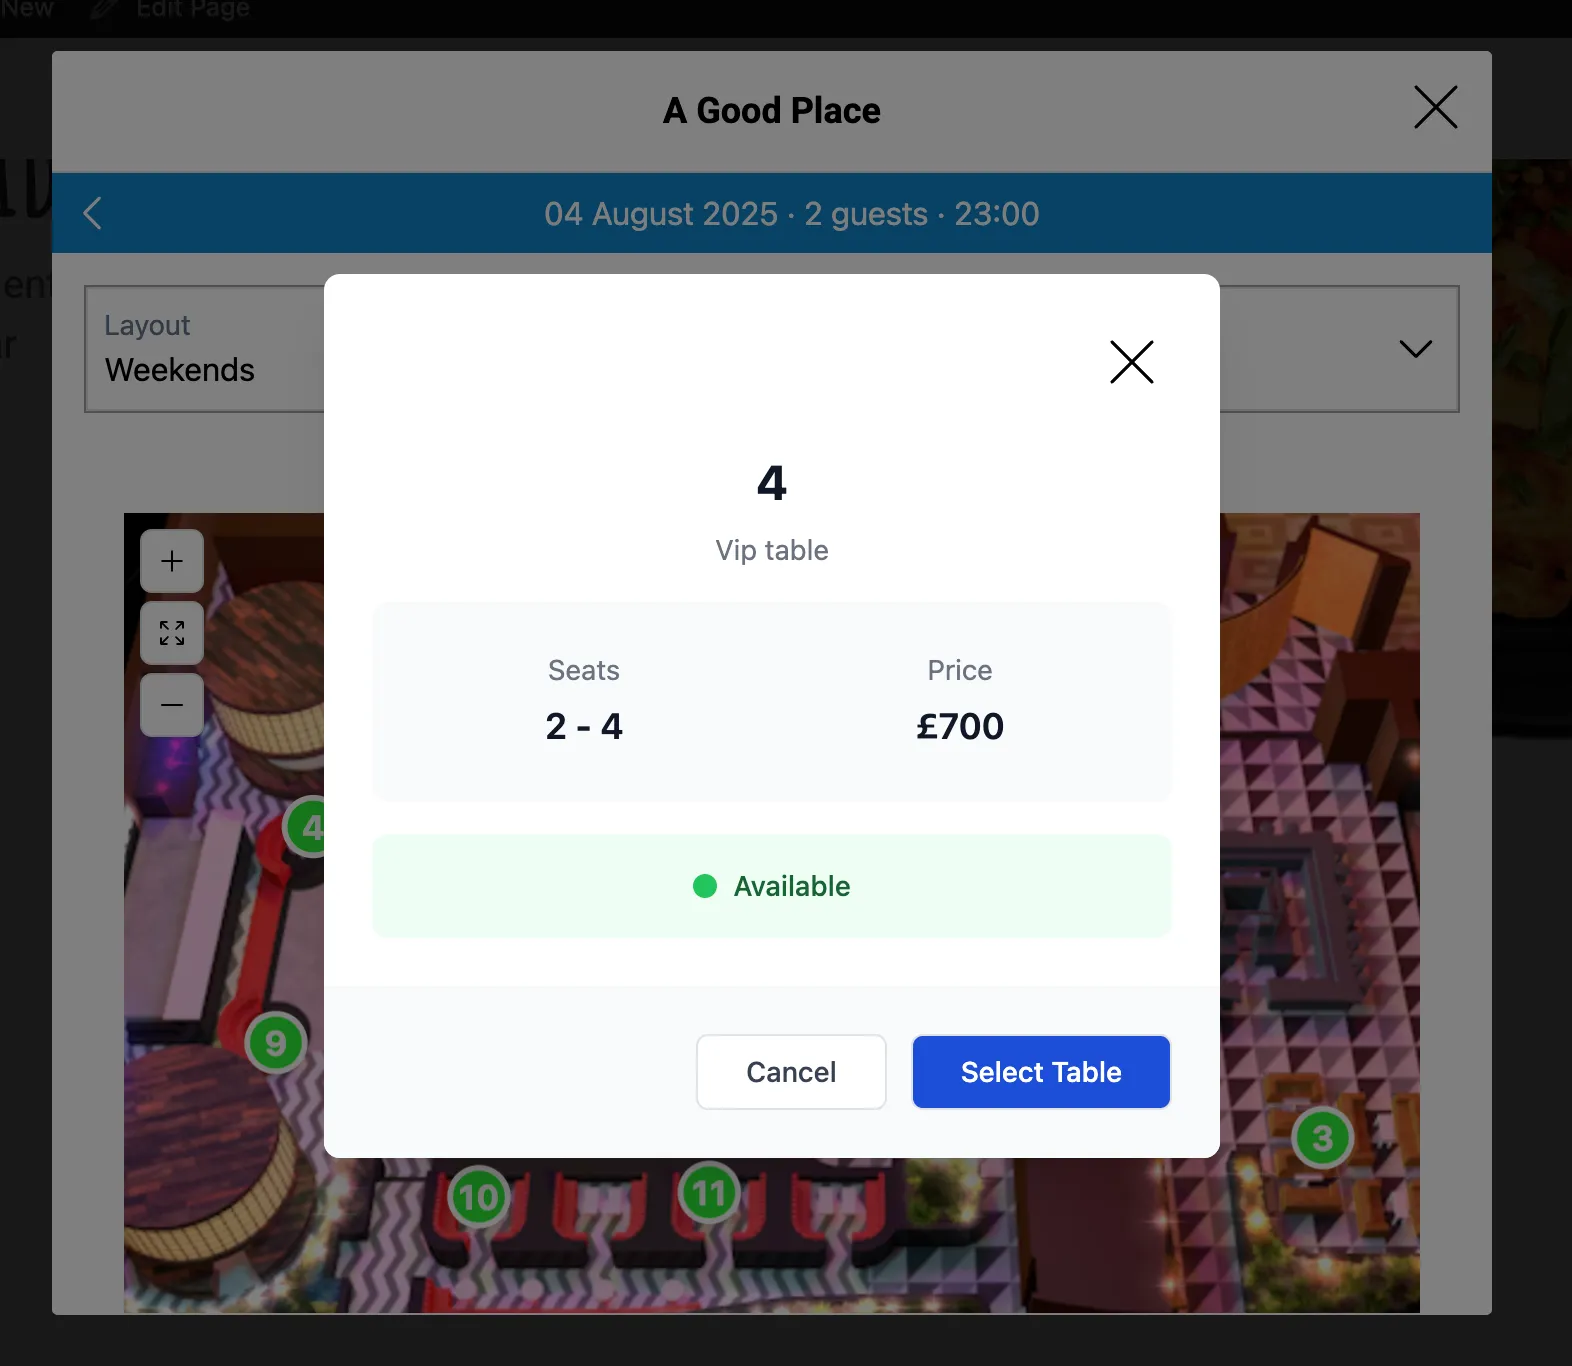
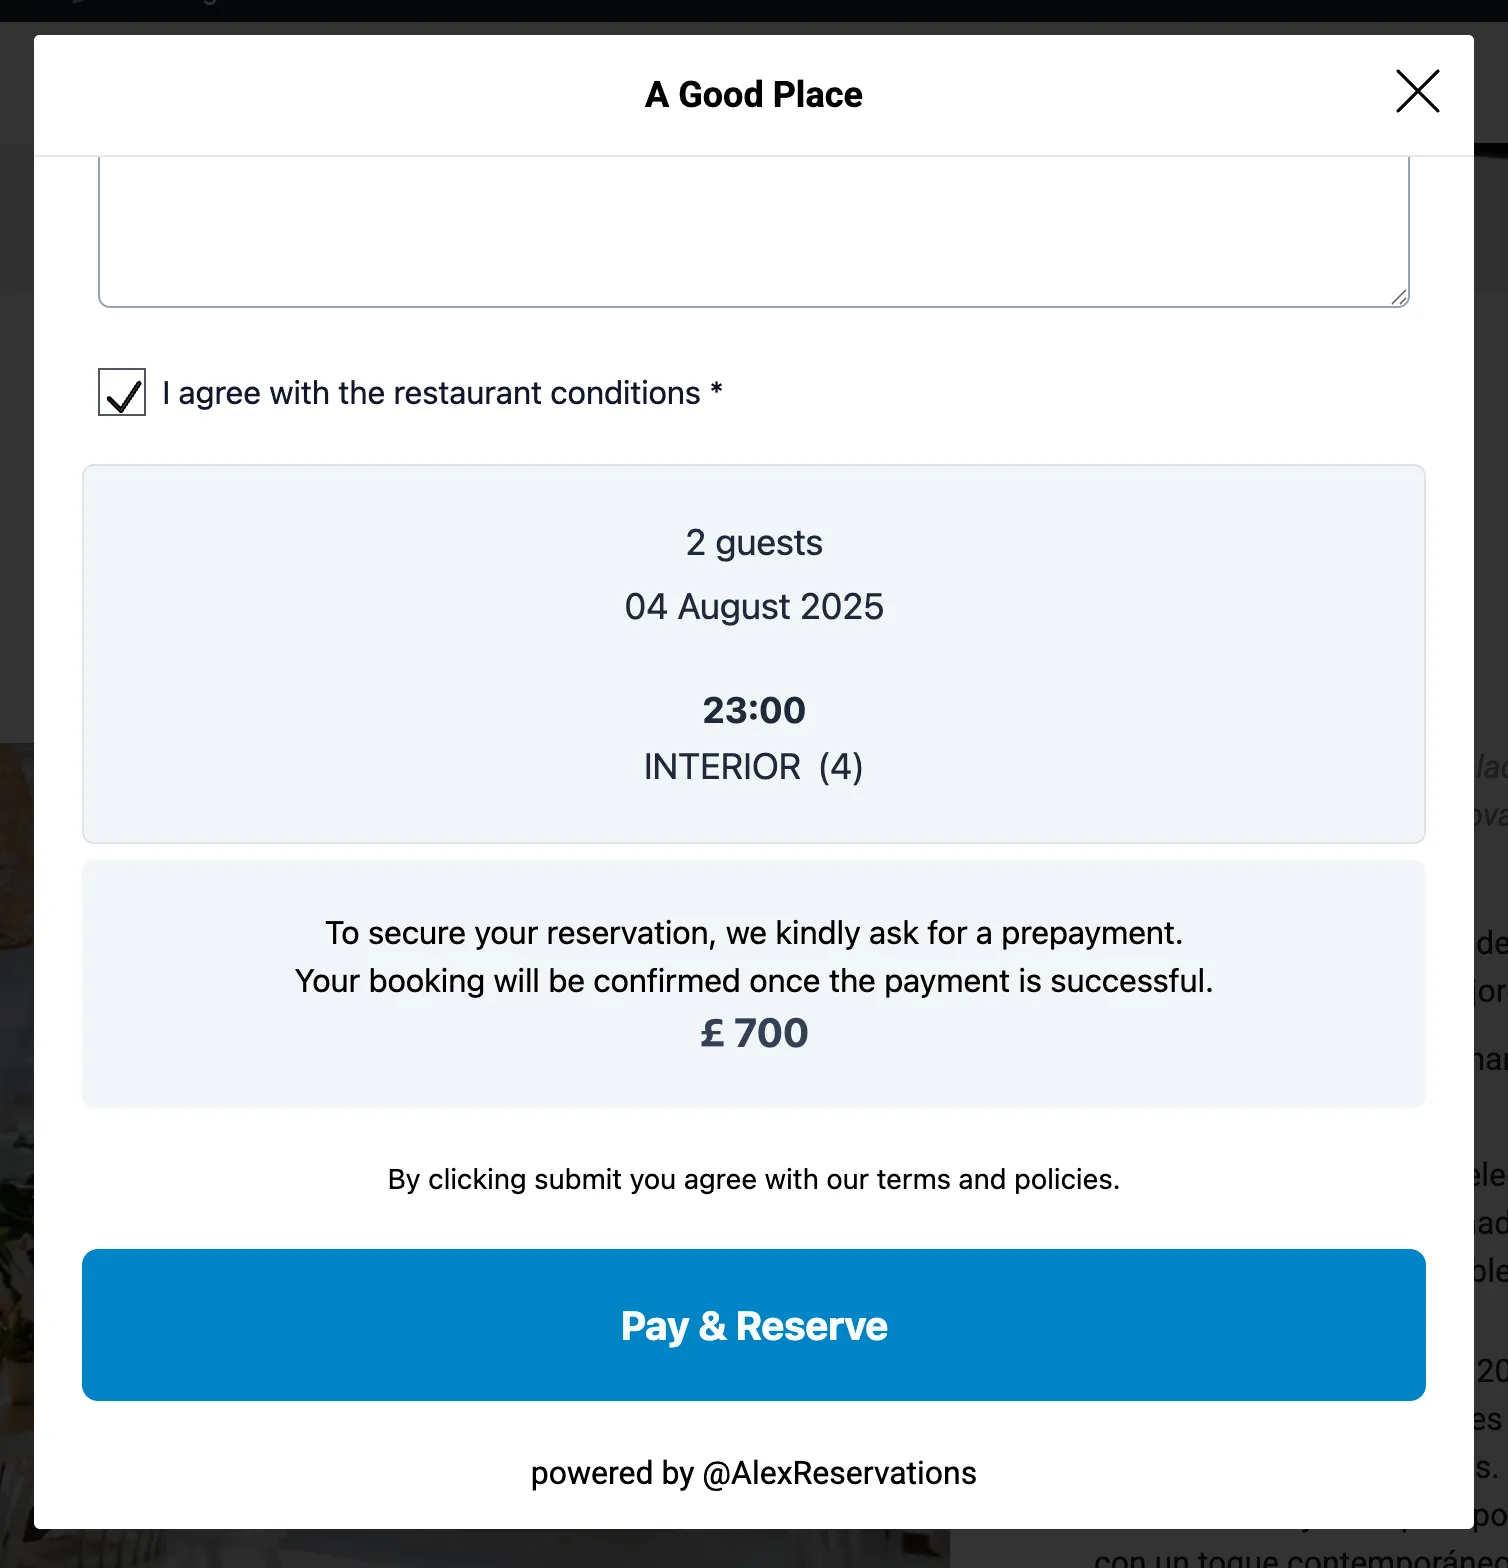
Show Final Table Details and Reservation Cost
Once the customer selects a table, the reservation form will display the full table details along with the calculated price (based on assigned tags).
This step confirms:
- Seating capacity.
- Table name or label.
- Any custom notes.
- Final cost, including table-based surcharges.
The customer can then proceed with the reservation, completing payment if required.
Why Use Custom Layouts?
- Visual Table Selection: Let guests choose their preferred table directly from a floorplan.
- Zone-Based Pricing: Charge more for premium locations or event-specific spots.
- Flexible Configuration: Assign different layouts per shift, day, or event.
- Improved UX: Guests see exactly what they’re reserving—no surprises.
- Operational Control: Manage every detail from tags to pricing centrally.