Settings - Shifts
Go to Settings -> Availability -> Shifts.
Use shifts to offer different recurring hours for:
- Daily Breakfast
- Daily Lunch
- Daily Dinner
- Weekend Breakfast
- Weekend Lunch
- Weekend Dinner
Or especial recurring events like:
- Live music dinner every Friday night
- Wine tasting once a month
- Beer tasting every 2 weeks, etc.

Select start date, end date, excluded dates, first seating and last seating. You can define the period between slots: every 15 minutes, 30 minutes, etc. You can also block specific time slots.

You should define how the seats will be assigned to the booking request:
All tables: all the online available tables can be used for assigning customers. Tables will be assigned automatically after the booking is received, for both statuses, pending and confirmed. You can re-assign them from the dashboard. If there are no free tables then the booking will be rejected.
Specific tables: the same as before but this time which tables will be used. Be aware that if the table that you have selected is checked as offline will not be available for the shift until you put it online again.
Max covers: you just define a total number of seats available at any moment during the hours the shift is open. With every booking request the system will check how many seats are available for the selected slot and duration.
Covers per slot: This feature provides a similar functionality to Total Seats but with enhanced precision for controlling the allowable number of guests for each time slot, enabling customized seating arrangements. As an illustration:
- From 12 PM to 1 PM: 20 seats
- From 1 PM to 2 PM: 30 seats
- From 2 PM to 3 PM: 30 seats
- From 3 PM to 4 PM: 40 seats
Please note that a reservation for 4 people over 2 hours will span 2 time slots.
Thus, the seat count is not merely about the seats booked within that slot but rather the total number of seats permitted.
Additionally, you have the option to designate the quantity of new seats accessible for each slot through the 'Max New Seats' field.


Status
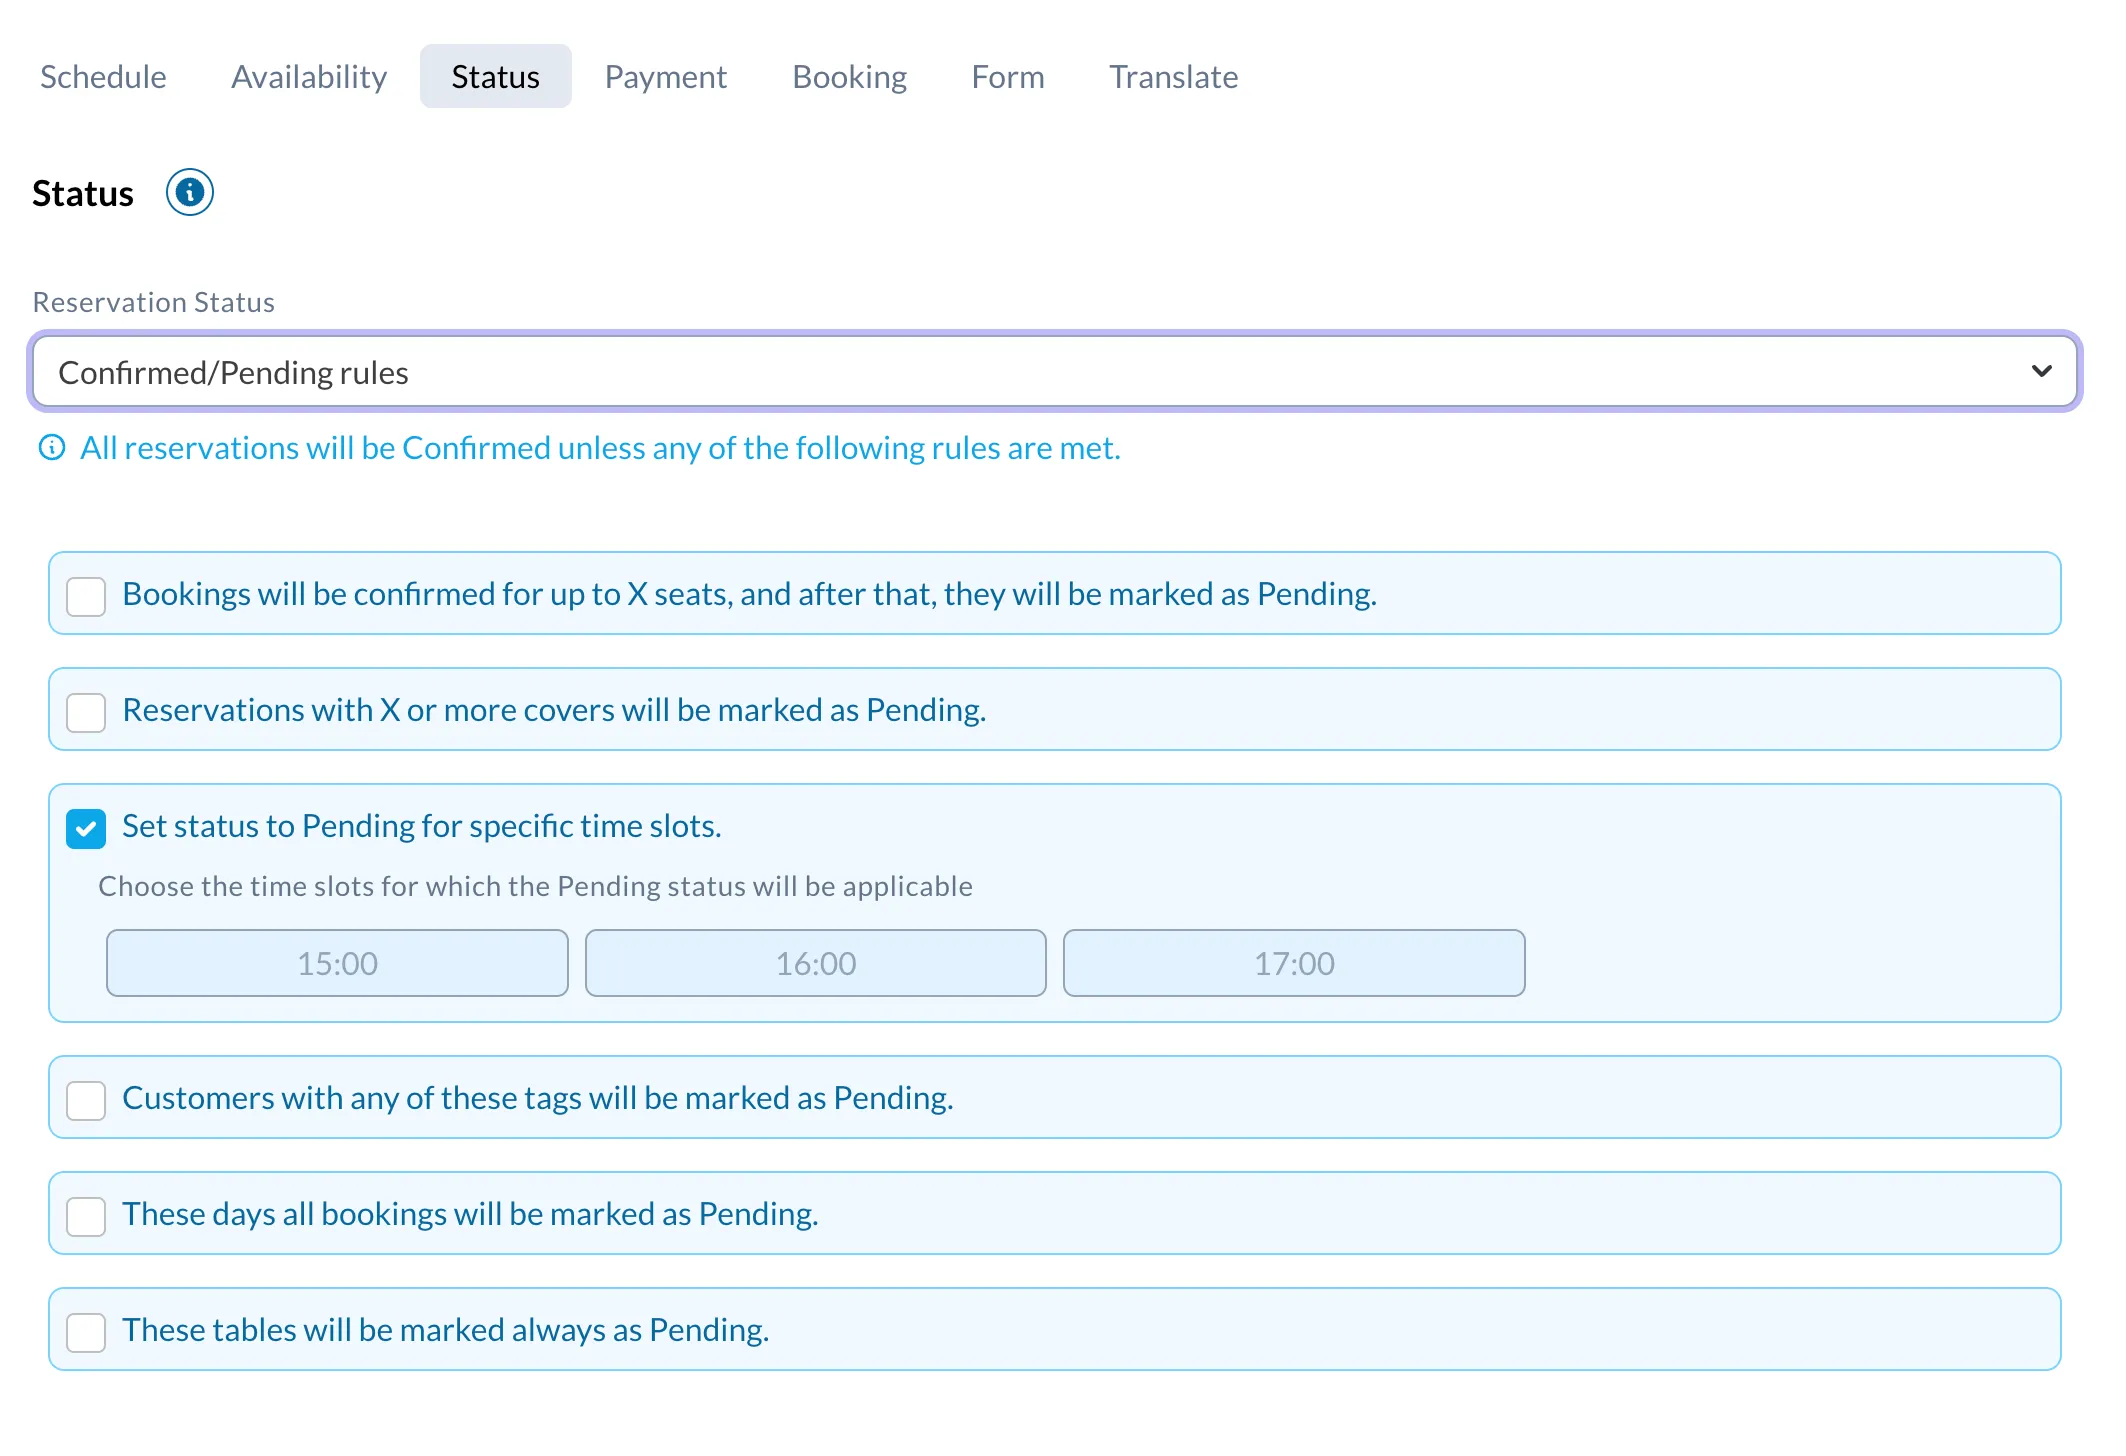
After the customer completes the form, it is crucial to define the status of the reservation. Here are the available options:
Pending: Select this option if you prefer to review each booking individually and send the confirmation at a later time. This allows for manual confirmation.
Confirmed: Use this option if you want to automatically confirm all bookings without any manual intervention. This streamlines the process by instantly confirming the reservation upon submission.
Rules for pending status: This feature allows you to set various criteria for flagging a reservation as pending.
Open window for reservations
There are 2 important settings to define:
From when the shift will be OPEN to start receiving bookings:
- Open all the time,
- Open only some hours before. For example if you want to open the lunch from 1 day before only, but not beyond that.
- Open the same day at some specific hour. You can accept bookings for dinner only from the same day at 10 in the morning.
- Open some days before at some specific hour. For example you want to start accepting bookings for dinner only from 2 days before at 1pm.
When the shift will STOP and cannot accept more bookings:
- Keep it open until the last minute.
- Close some hours before.
- Close the same day at some specific time.
- Close several days before. Useful if you want to close bookings 2 days before a Wine tasting event.

Cancellation, Modification & Reconfirmation
Additionally, you have the option to specify whether the user is allowed to cancel or modify their reservation, including setting a time limit for these actions.
You can also request that the user re-confirms their reservation. In this scenario, the customer's booking interface will display a new button, enabling them to re-confirm.


Ask for the number of children
Some restaurants need to know how many children are in the party, for example to prepare high chairs, offer a kids menu or plan the seating differently.
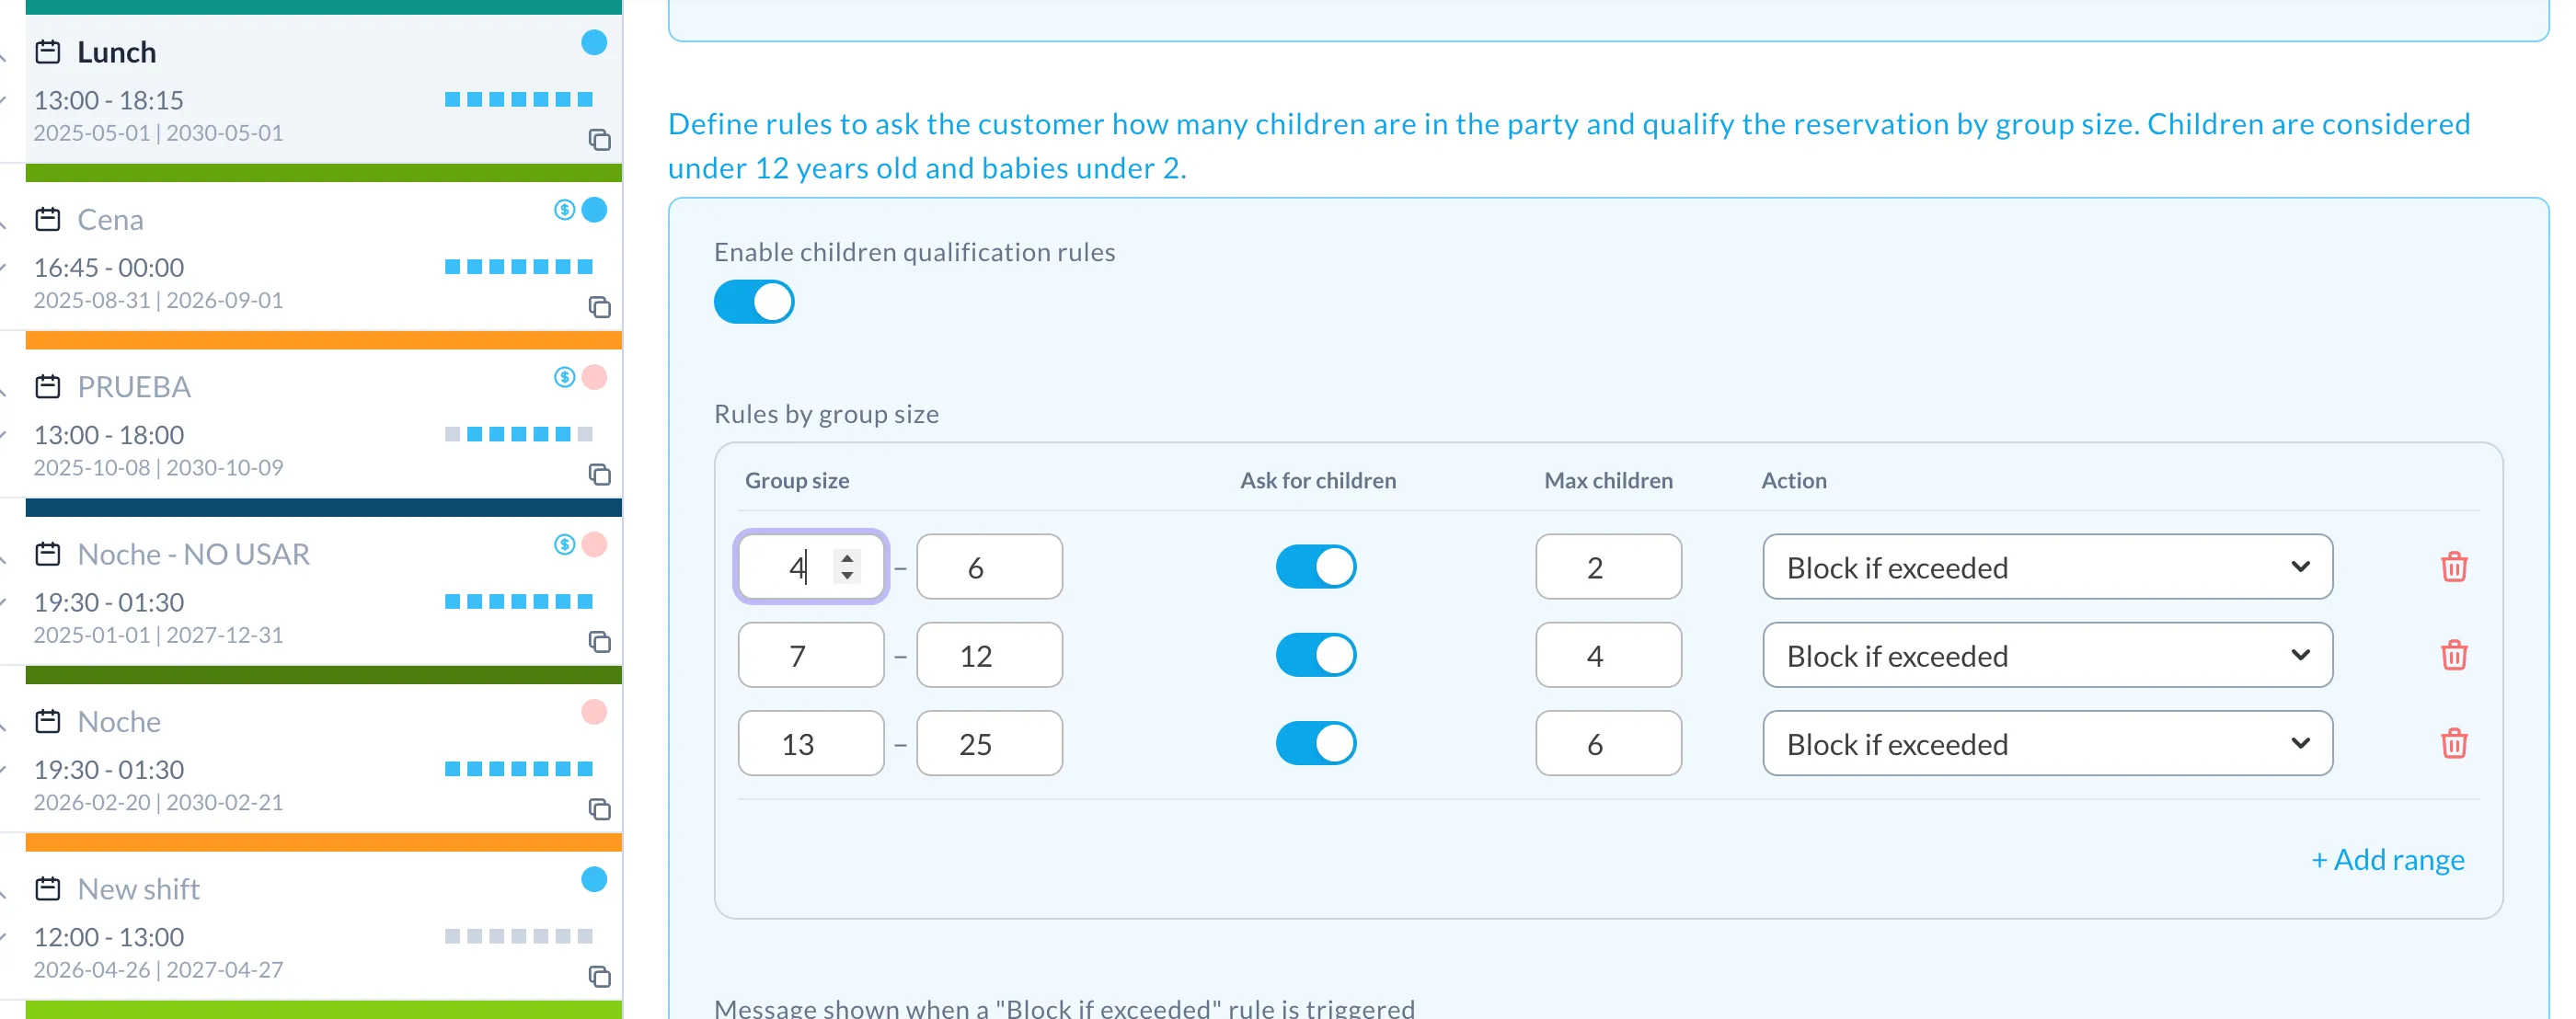
You can configure the shift to ask the customer how many children are in the party, and qualify the reservation by group size.
Children are considered under 12 years old, and babies under 2.
You define one or more rules by group size. For each party-size range you can set:
- Ask for children: turn this on to ask the customer how many children are in the party for that range.
- Max children: the maximum number of children allowed in that range.
- Action: what happens when the maximum is exceeded.
- Allow: the number of children is recorded and the booking is accepted.
- Block if exceeded: the booking is rejected when the number of children is above the maximum.
You can add several non-overlapping ranges, so the behaviour can differ for small and large groups.
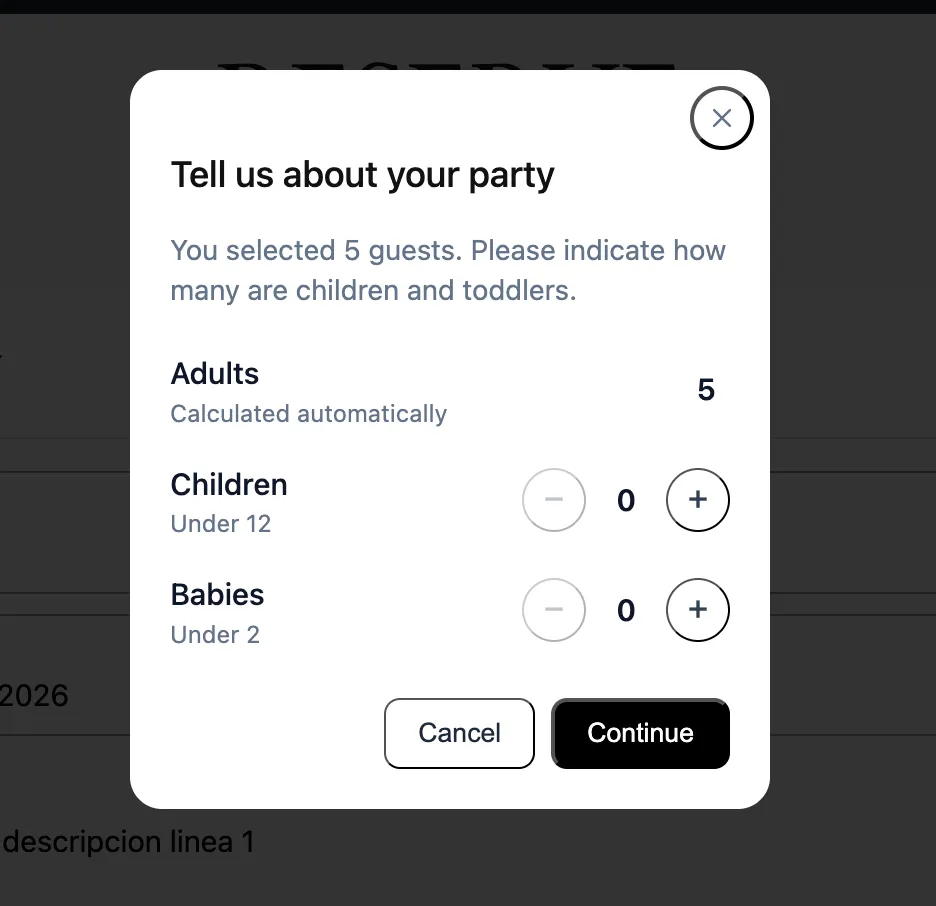
When a customer makes a reservation that matches a range with Ask for children enabled, the widget asks how many children are in the party.
The number is saved with the booking, so your staff can see it on the dashboard and prepare accordingly.