Building a 360-Degree Panorama Navigation for Table Reservations: A Comprehensive Guide - Part 1
The digital revolution has transformed how restaurants operate, from marketing to reservations. One particularly exciting development is the use of 360-degree panoramas for table reservations. With this technology, potential diners can virtually walk through the restaurant to choose their preferred table, dramatically enhancing user experience and increasing the likelihood of reservations. In this article, we'll delve into the steps to create a 360-degree panorama navigation system for table reservations.
Step 1: Create the Floor Plan
Begin by creating a detailed floor plan of your restaurant, outlining the different areas and the tables in each area. You can use specialized software for this or even hand-drawn sketches as long as they are accurate. This floor plan will act as the blueprint for your 360-degree panorama navigation.
 Alex Reservations | Floor Plan
Step 2: Capture the Panoramas
Once you have the floor plan, it's time to create the panoramas using a 360-degree camera. The goal is to cover all areas of the restaurant comprehensively. Identify strategic vantage points that show off the restaurant's ambiance, décor, and table arrangements. Make sure each area is well-lit and looks appealing to ensure high-quality panoramas.
 Alex Reservations | Panorama 360
Step 3: Upload and Position the Panoramas
After capturing the panoramas, go to the dashboard and find the panorama editor, usually linked from the floor plan editor. Here, you'll upload the captured panoramas. For each panorama, determine the appropriate position and zoom level you want to display when that particular view is presented. Use the marker button to save these positions.
 Alex Reservations | Upload Panorama
Step 4: Create Navigation Hotspots
To make the panoramas interactive and navigable, create 'hotspots' that link different panoramas together. These hotspots enable the user to "walk" from one area of the restaurant to another by clicking on these points. Usually, you'll find a 'Hotspots' tab within your editor where you can create and style these linking points.
 Alex Reservations | Add hotspots
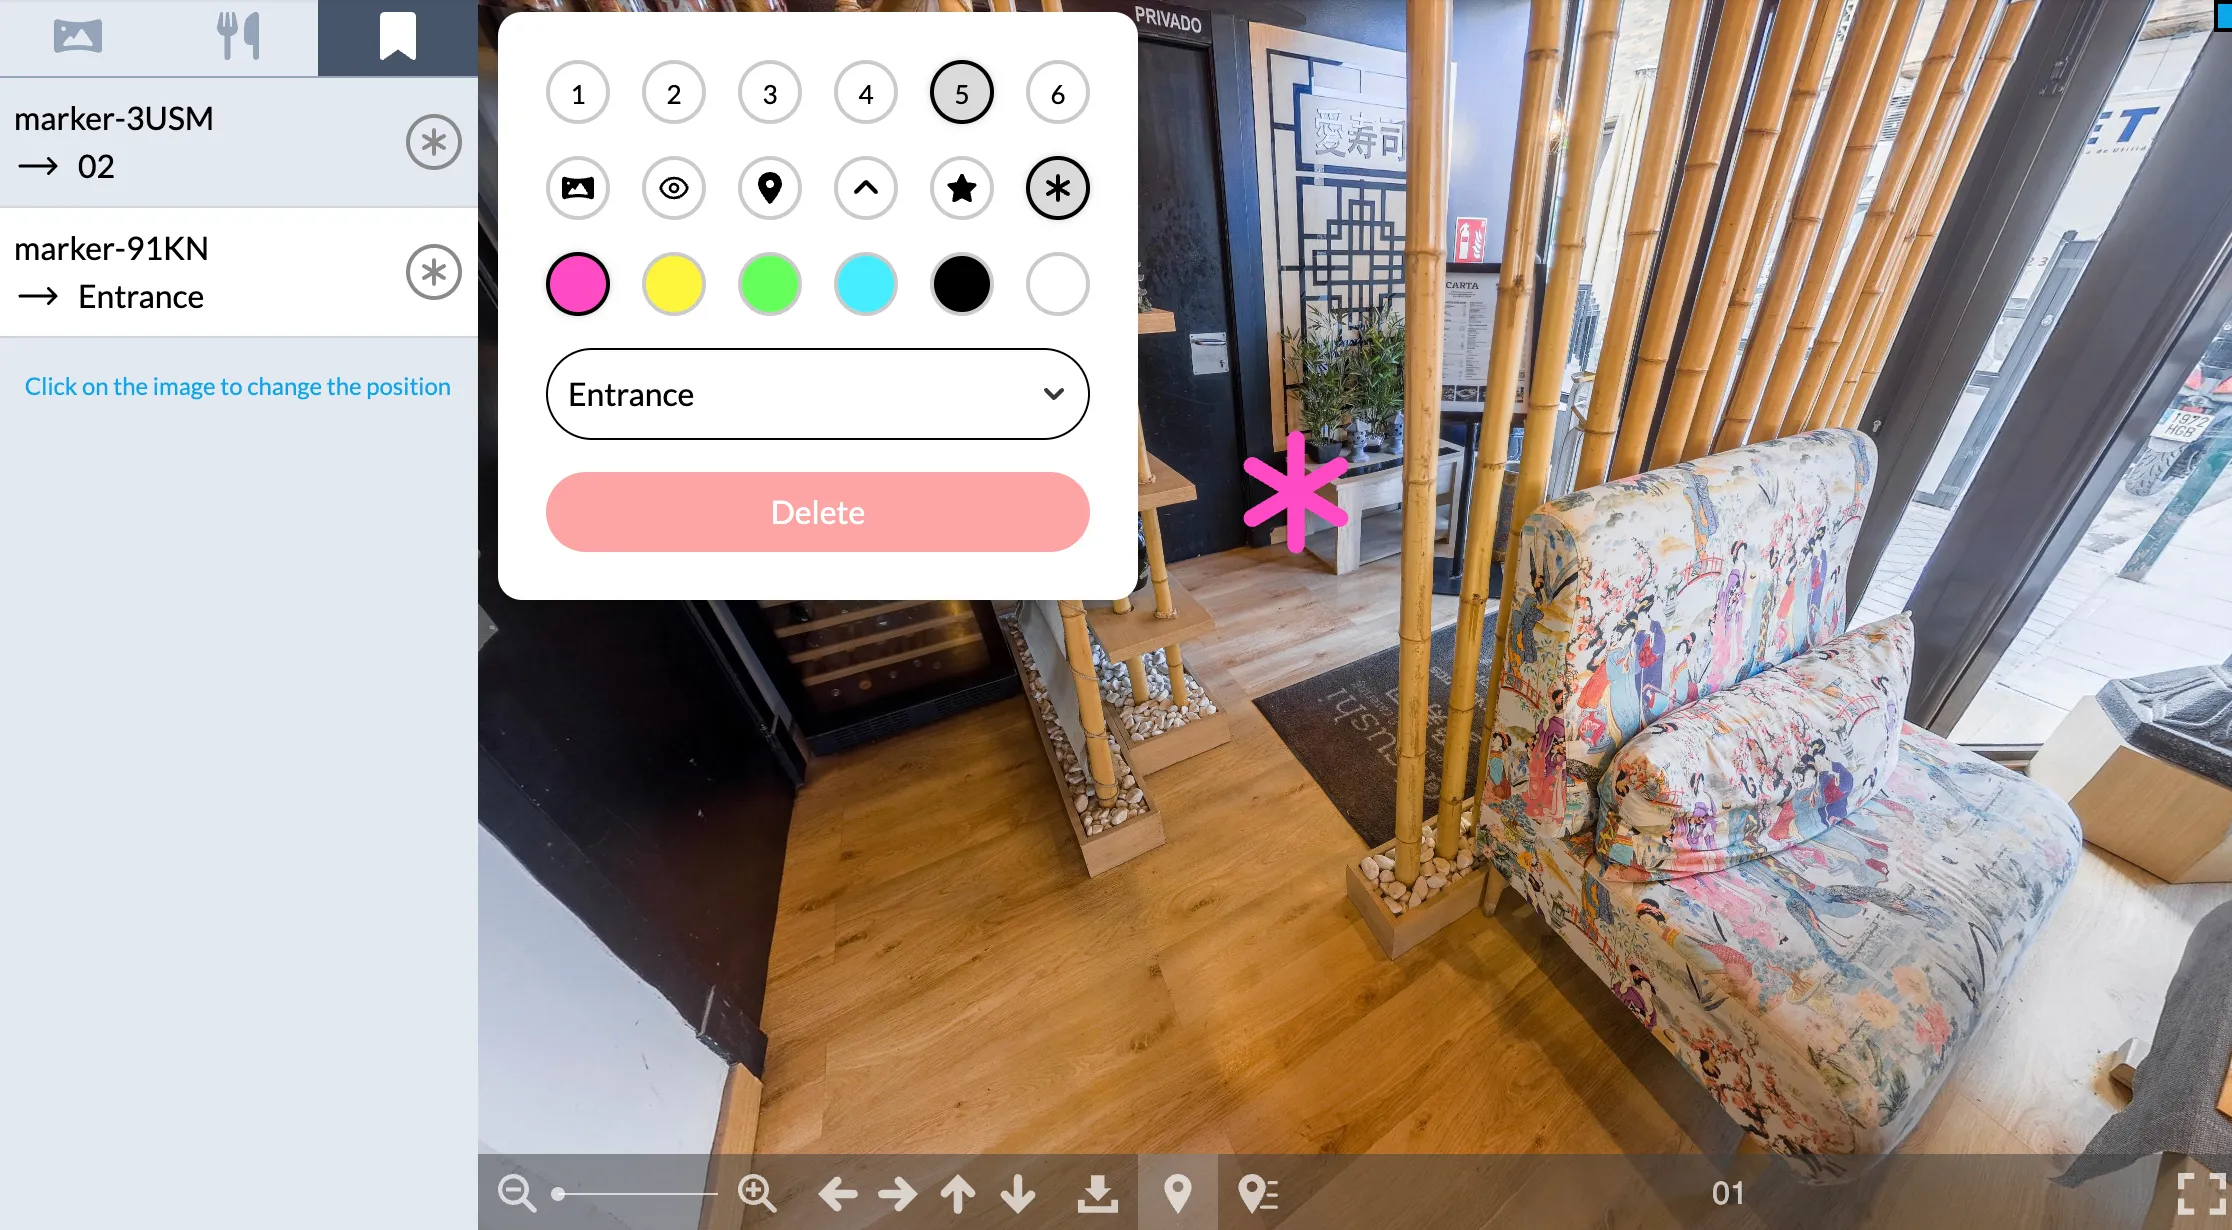
Step 5: Add Table Markers
Navigate to the 'Tables' tab to start placing markers for each table on the corresponding panoramas. These markers indicate available tables for reservation. You have the flexibility to re-position each marker by clicking on another point in the view. Additionally, you can style the markers to match your restaurant's branding or theme.
 Alex Reservations | Add tables markers
Step 6: Test in Full-Screen Mode
Before going live, it's crucial to test the navigation experience. Switch to full-screen mode and walk through the different panoramas. Make sure the transitions are smooth and that the panoramas display the pre-set positions you chose earlier. This step ensures that the user experience is as intuitive and engaging as possible.
 Alex Reservations | Test full screen
Implementing a 360-degree panorama navigation system for table reservations can provide an interactive and visually stunning experience for potential customers, setting your restaurant apart in a crowded market. While it does require some technical work and an initial investment of time and resources, the return on investment can be substantial in terms of enhanced user experience and increased reservations.
Follow these six steps to create an intuitive, engaging, and efficient system that not only elevates your restaurant’s online presence but also creates a more satisfying booking experience for your customers.
In Part 2, we will explore how to integrate these panoramas into your reservation form process.