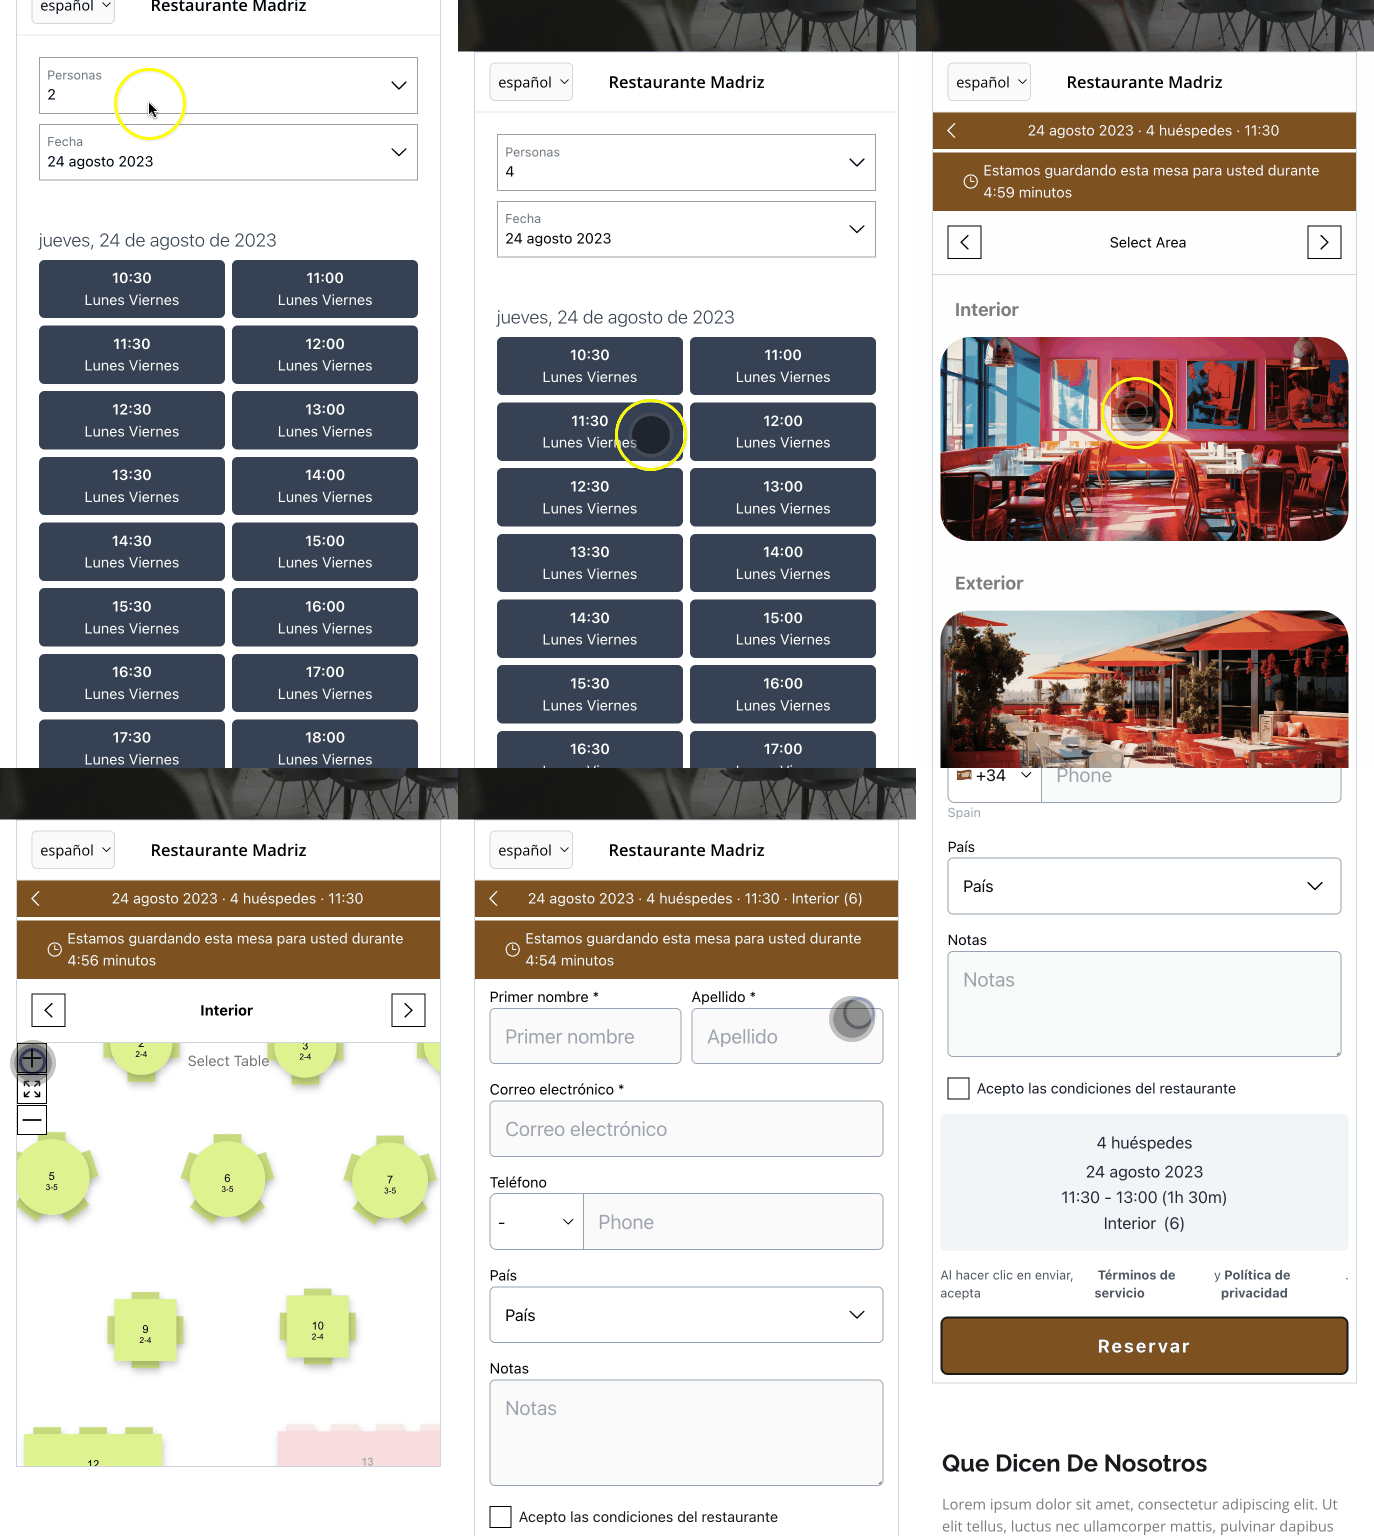
Mastering Mobile Reservations: How to Design an Interactive Restaurant Booking Form with Table Selection Feature
We've launched a new feature that enables you to personalize your reservation form. This allows users to choose their preferred area and table.

Steps
To activate this new feature, follow these steps:
1- Develop your floor plan.
2- Attach images to each area.
3- Establish your shift and activate the availability mode.
4- Enable the new selection mode for areas and/or tables.
Define your floor plan
The initial step is to outline your floor plan with the designated areas. Depending on whether you plan to manage table reservations, you can also specify tables within each area.
You must ensure that the areas and tables are available for online reservation. The presence of a green dot indicates whether these areas/tables are available.

By clicking the 'Areas' button, you can view a list of areas and tables. Clicking the green/red button allows you to easily switch the online availability on and off.
The rationale behind not setting all tables for online reservation might be your preference to manually manage some for walk-in guests.

Adding photos to areas
To add a custom image to each area, use the pencil icon located on the area header. These images will later be used for area selection on the reservation form.

Availability mode
We offer four methods for determining how your shift can be controlled via the reservation widget:
1- All 'online' tables can be designated as available for reservations.
2- You can specify which tables are available for a particular shift.
3- You can set the maximum number of guests (covers) permitted.
4- You can establish the number of covers allowed per slot.

Within the availability tab, you'll find a new section where you can determine how the user makes their selection.
Availability: max covers
When employing the maximum number of covers option, you can choose from two scenarios:
1- The customer does not have the ability to select the area. In this case, once the user has chosen the date and time, they will be immediately redirected to the form to complete the process.
2- The customer can select the area. After initial selection, the user will be directed to a second step to choose the area before entering the rest of the form details.

You'll need to specify the number of covers permitted for each area, bearing in mind the maximum cover limit you previously set. For instance, out of a total of 100 covers, you might allocate 70 for the interior room and 30 for the exterior space.

Here's how the reservation process appears to the customer.

Availability: tables
When choosing to use the tables mode, you will encounter three options:

1- The user won't be able to select either the area or the table. After choosing the date and time, the customer will be taken directly to the form.
2- The user can select only the area, but not the table. In this situation, you will need to assign the table within the chosen area by the customer at a later stage.
3- The user can select both the area and the table. After choosing the area, the user will be shown the floor plan to select their preferred table. In this situation, the system will automatically assign the preferred table to the guest.
Here's how the reservation process appears to the customer.

View the selection at your dashboard
You'll discover a new column on your dashboard that displays the customer's new selections.

You can also view this information from the reservation editor pop-up.

Complete process video
This video provides a concise overview of the entire process.